Gnosis Chain Quickstart
This guide shows you how to deploy a smart contract to Gnosis Chain using Remix IDE.
Prerequisites
- Basic understanding of programming
- Firefox or any Chromium-based browser (Chrome, Brave, Edge, etc.)
Web3 Setup
Create a wallet
Gnosis Chain requires a Web3 wallet to interact with the network. In this tutorial, we'll cover MetaMask as an example. You can download and install MetaMask from the official website. Follow the instructions in the app and create your new wallet. Make sure to save your 12-word mnemonic phrase in a secure location.
Add Chiado to your wallet
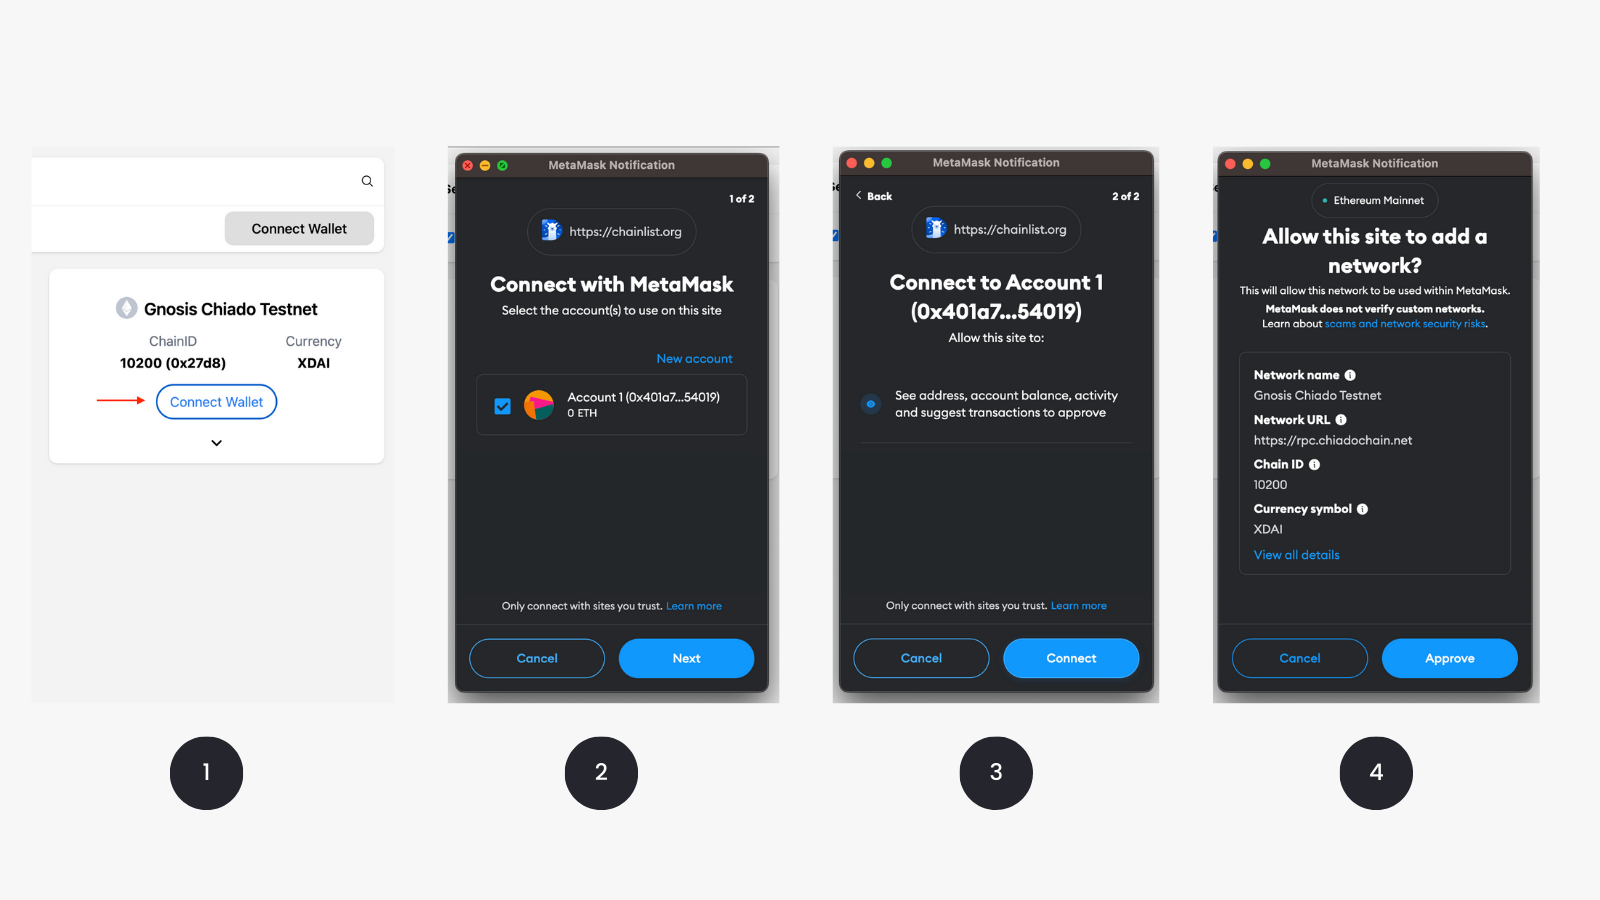
After you create a wallet, add the Chiado network to the list of available networks:
- Go to Chainlist
- Search for Gnosis
- Connect your wallet
- Approve a new network
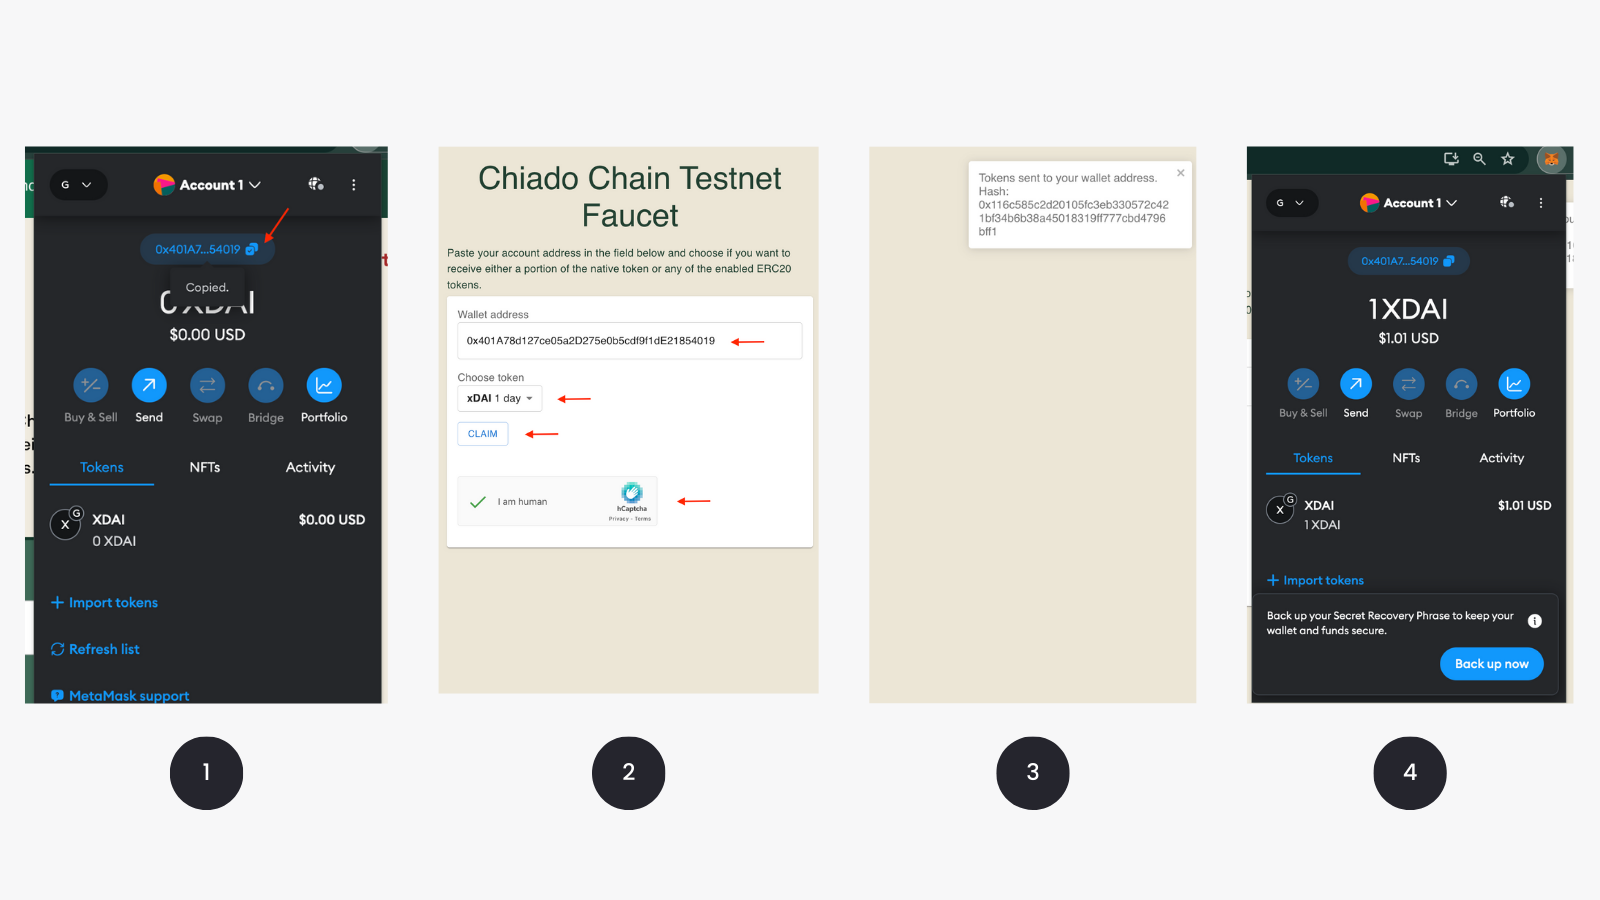
Fund your wallet
Lastly, top up the wallet with xDAI that you'll use for contract deployments on one of the environments: Chiado Testnet or Gnosis Mainnet. It's recommended to deploy contracts on the testnet first and use the mainnet only after you've done proper security audits.
Testnets on any EVM-compatible chains don't require real funds to pay for transactions. Instead, they use faucets that represent free tokens. You can use the following faucets to get xDAI on the Chiado testnet:
Deploy a contract
Your first contract is a simple Hello World that can set and retrieve variables.
// SPDX-License-Identifier: MIT

pragma solidity 0.8.22;

contract HelloWorld {
    string public value;

    constructor(string memory initialValue) {
        value = initialValue;
    }

    function updateName(string memory newValue) public {
        value = newValue;
    }
}
You can deploy this contract as follows:
-
Open Remix IDE
-
Create a new file
HelloWorld.sol -
Paste the above code or write your own contract
-
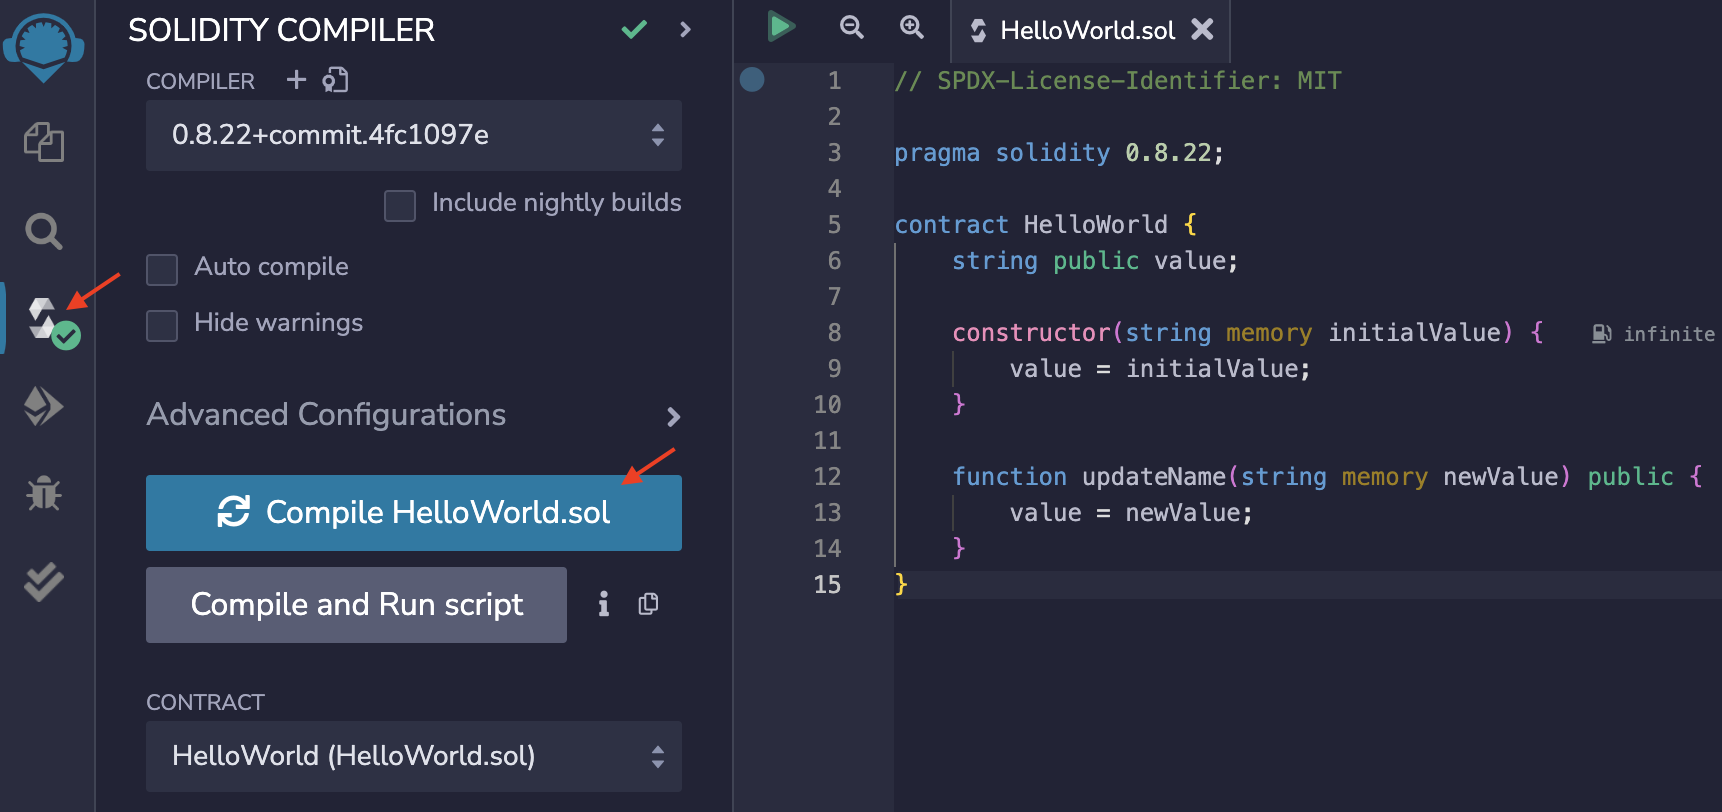
Compile your contract
Go to Solidity compiler and select Compile HelloWorld.sol. You can leave the default compilation settings.
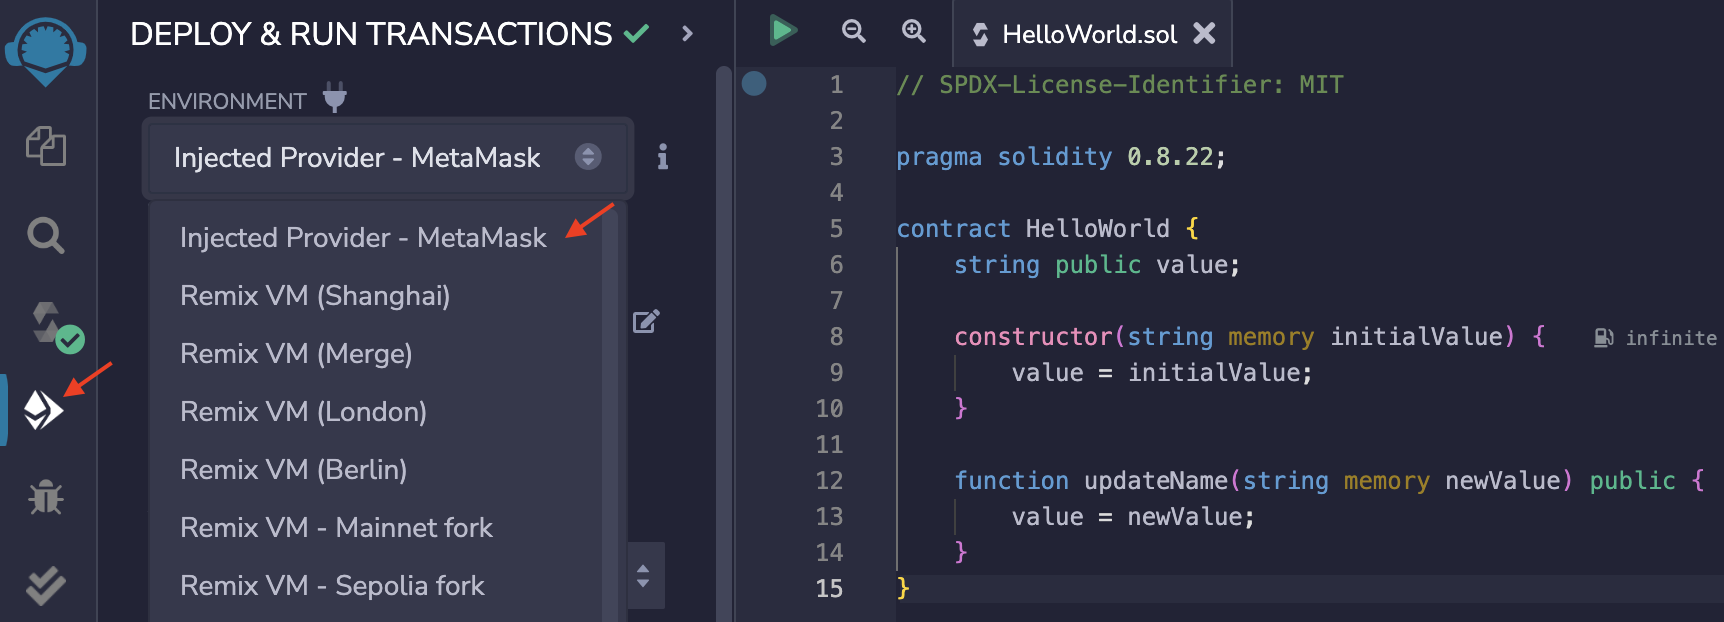
- Select deployment environment
Go to Deploy & run transactions and select Injected Provider - MetaMask as your environment.
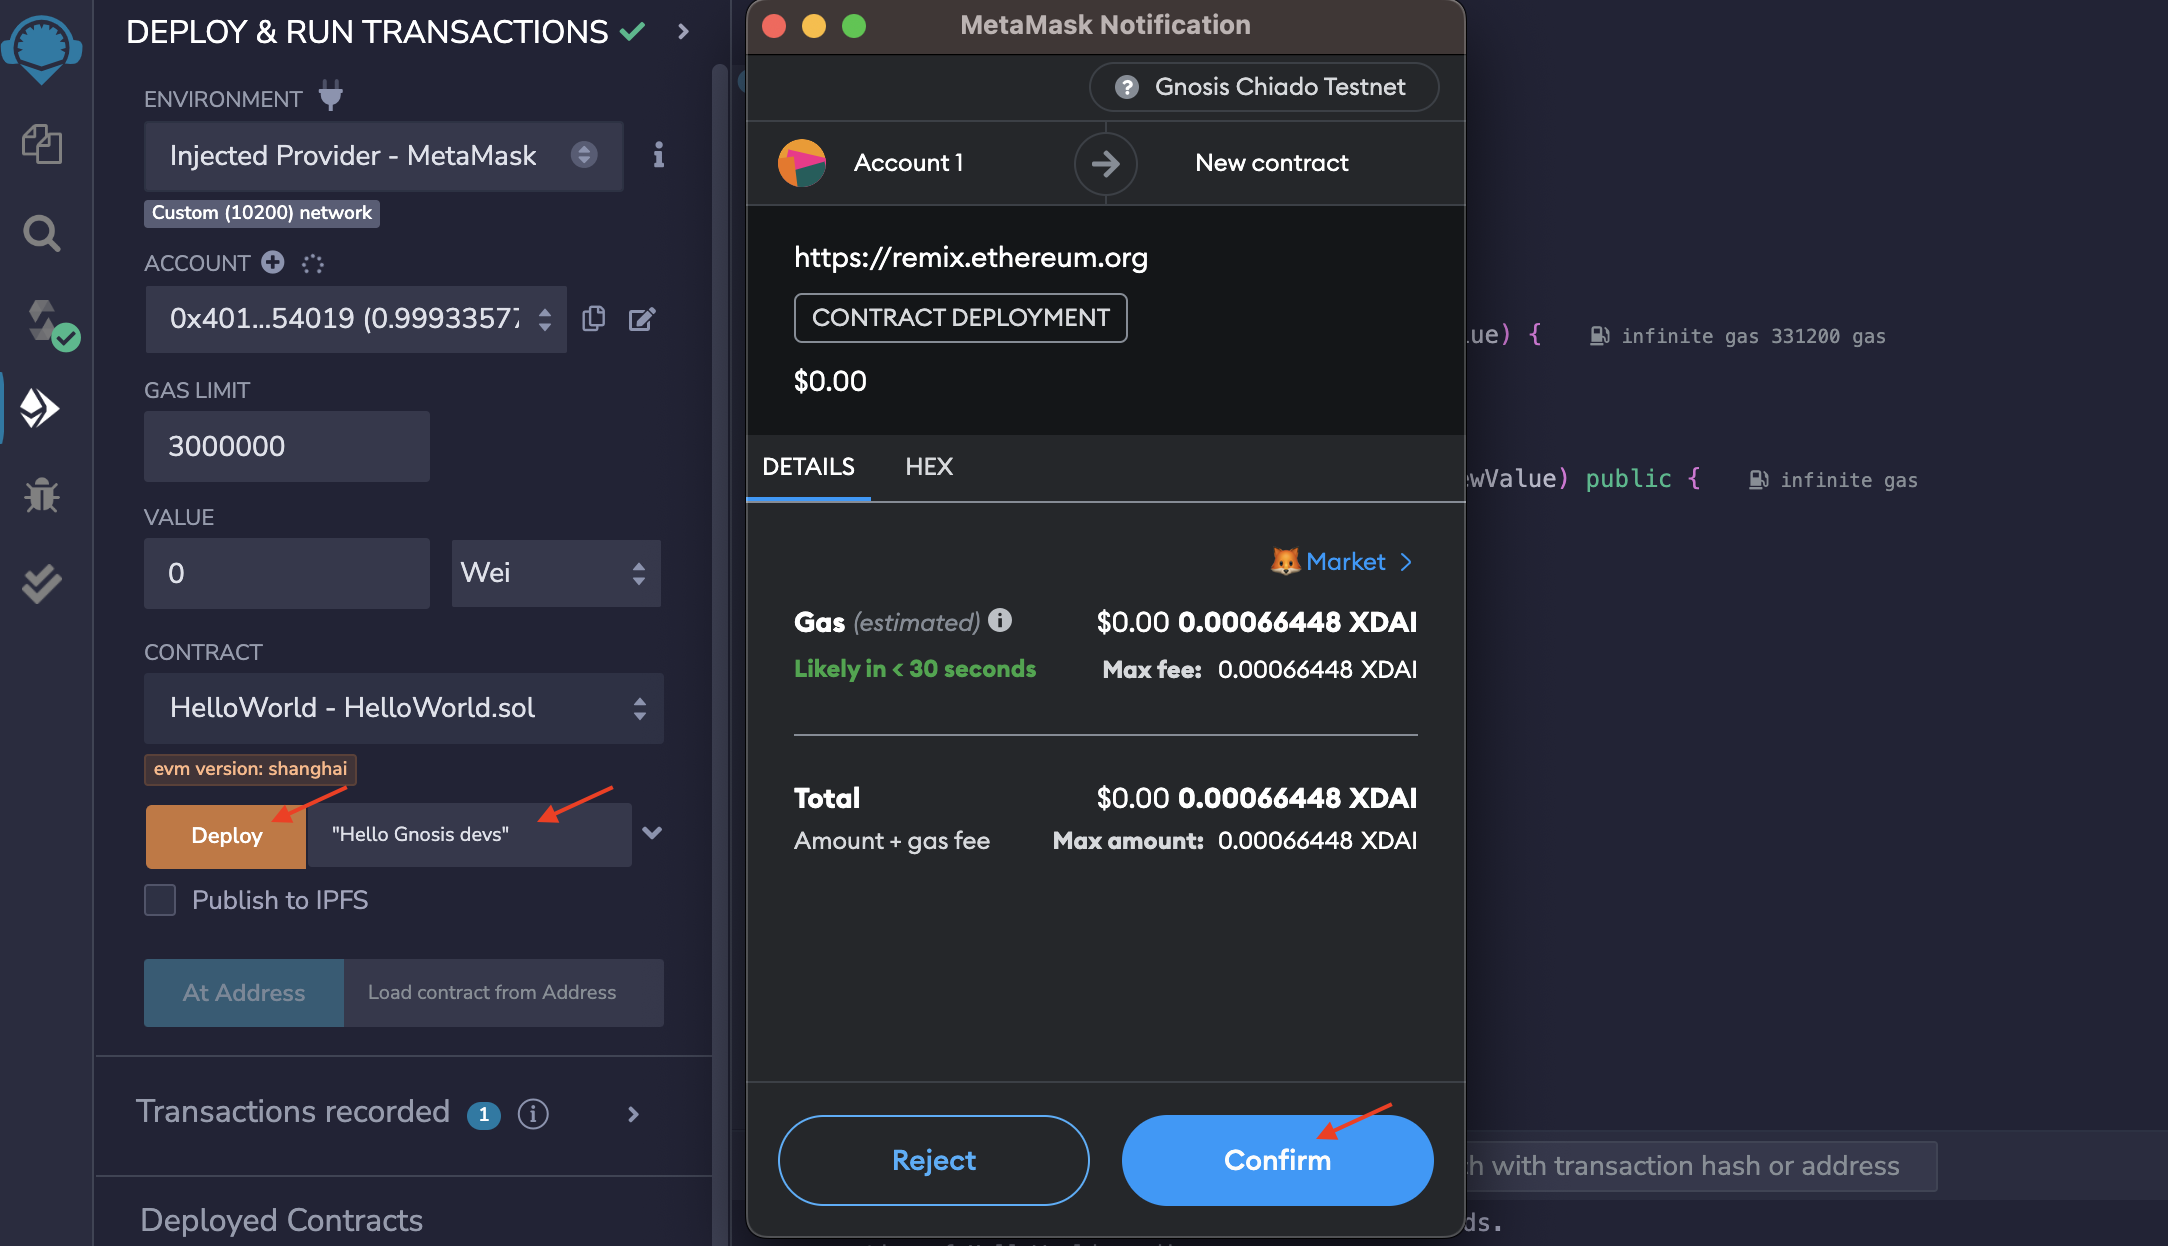
- Deploy contract
Lastly, put the initial value in the constructor and click Deploy.
- Check result
If the deployment is successful, you'll see the result in your logs that looks as follows:
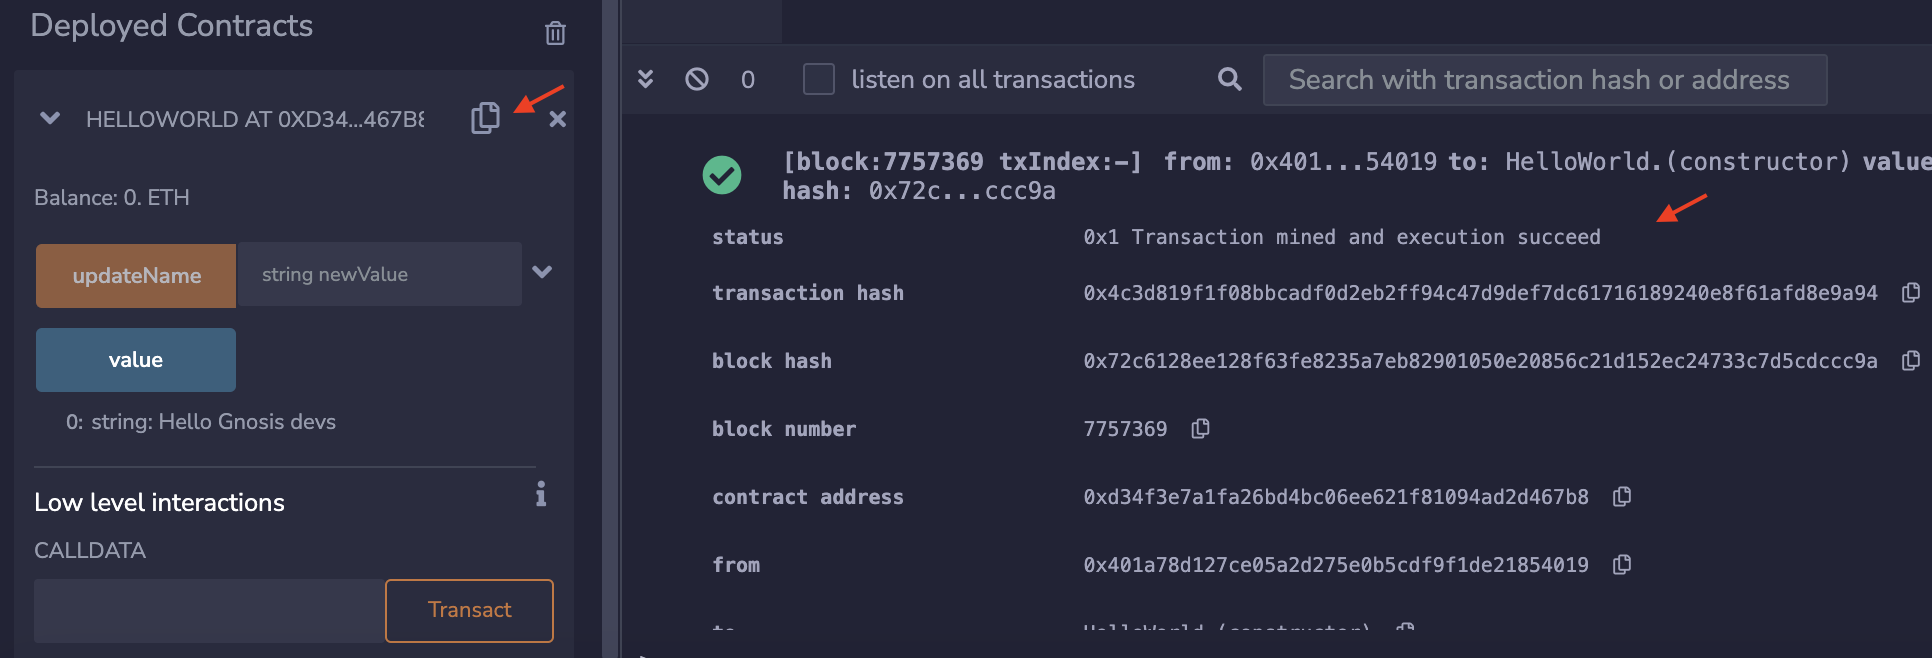
Make sure to save the contract address. You'll need it in the future.
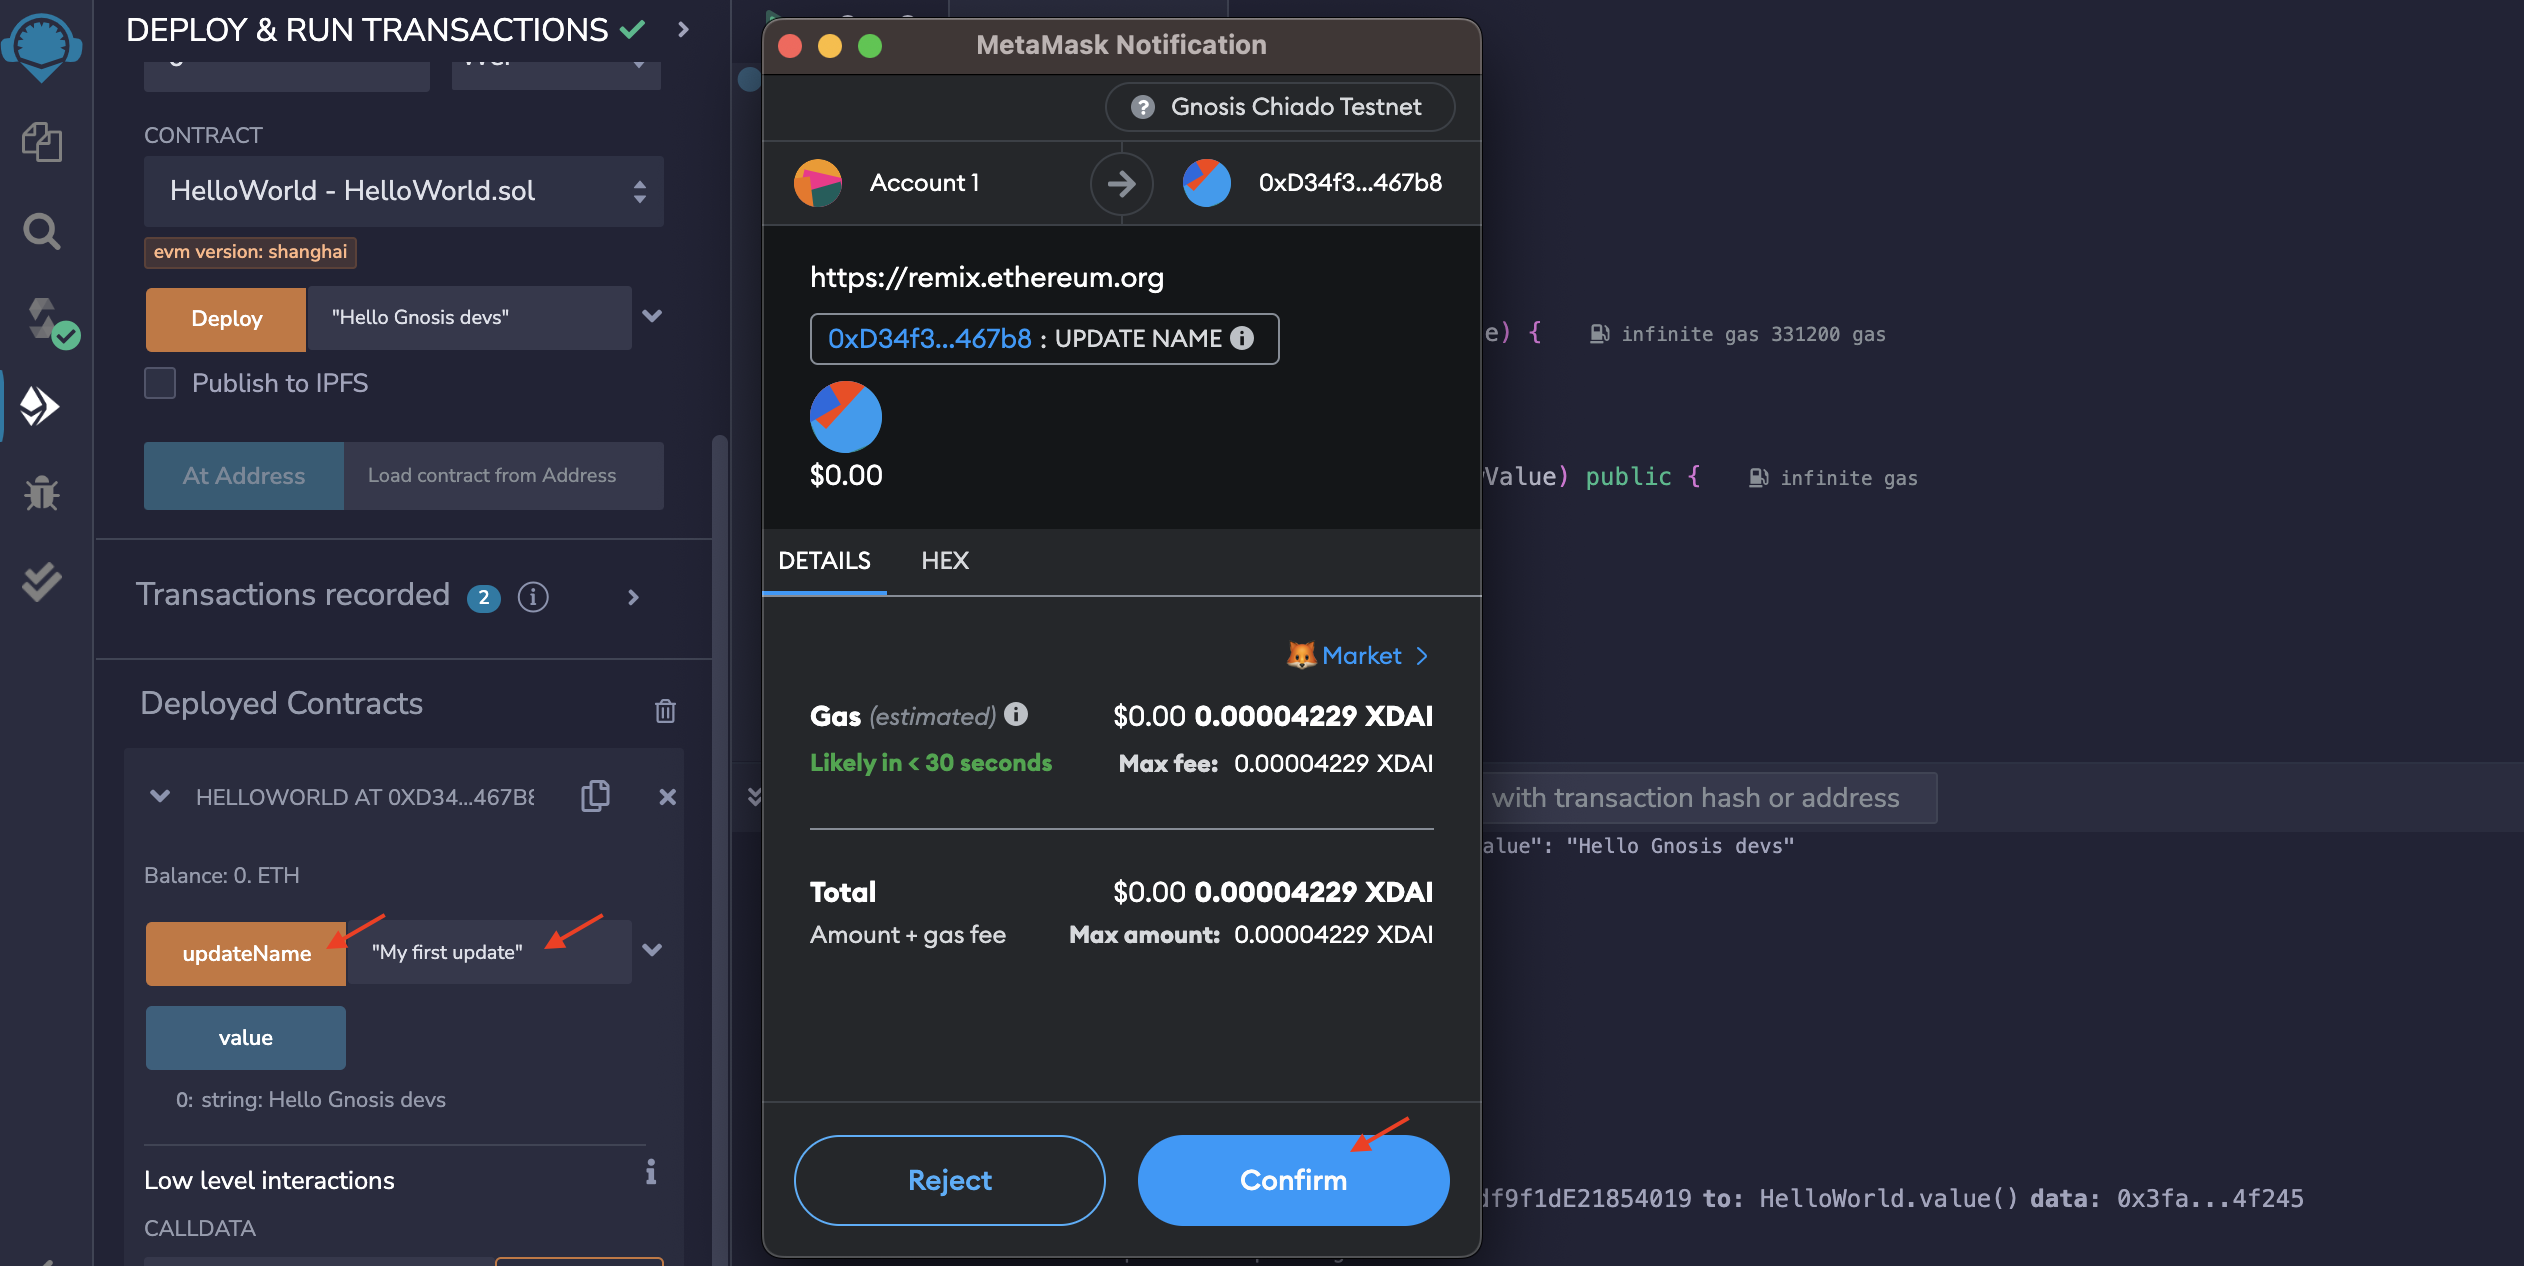
- Interact with the contract
Now that your contract is deployed, you can retrieve the current value or set a new one as follows: