Validator Deposits
Overview
- You will need to make a deposit of 1 GNO for each validator.
- You can make a bulk deposit for up to 128 validators at a time.
Pre-requisites
- Execution Layer client and Beacon Node should be fully synced
- Validator process should already be running
GNO on Gnosis Chain
- Validators need to be funded using GNO on Gnosis Chain
- You will need to bridge GNO over from Ethereum to Gnosis Chain
You can use Transferto.xyz or the Omnibridge to bridge GNO from Ethereum to Gnosis Chain.
Option 1: Deposit UI
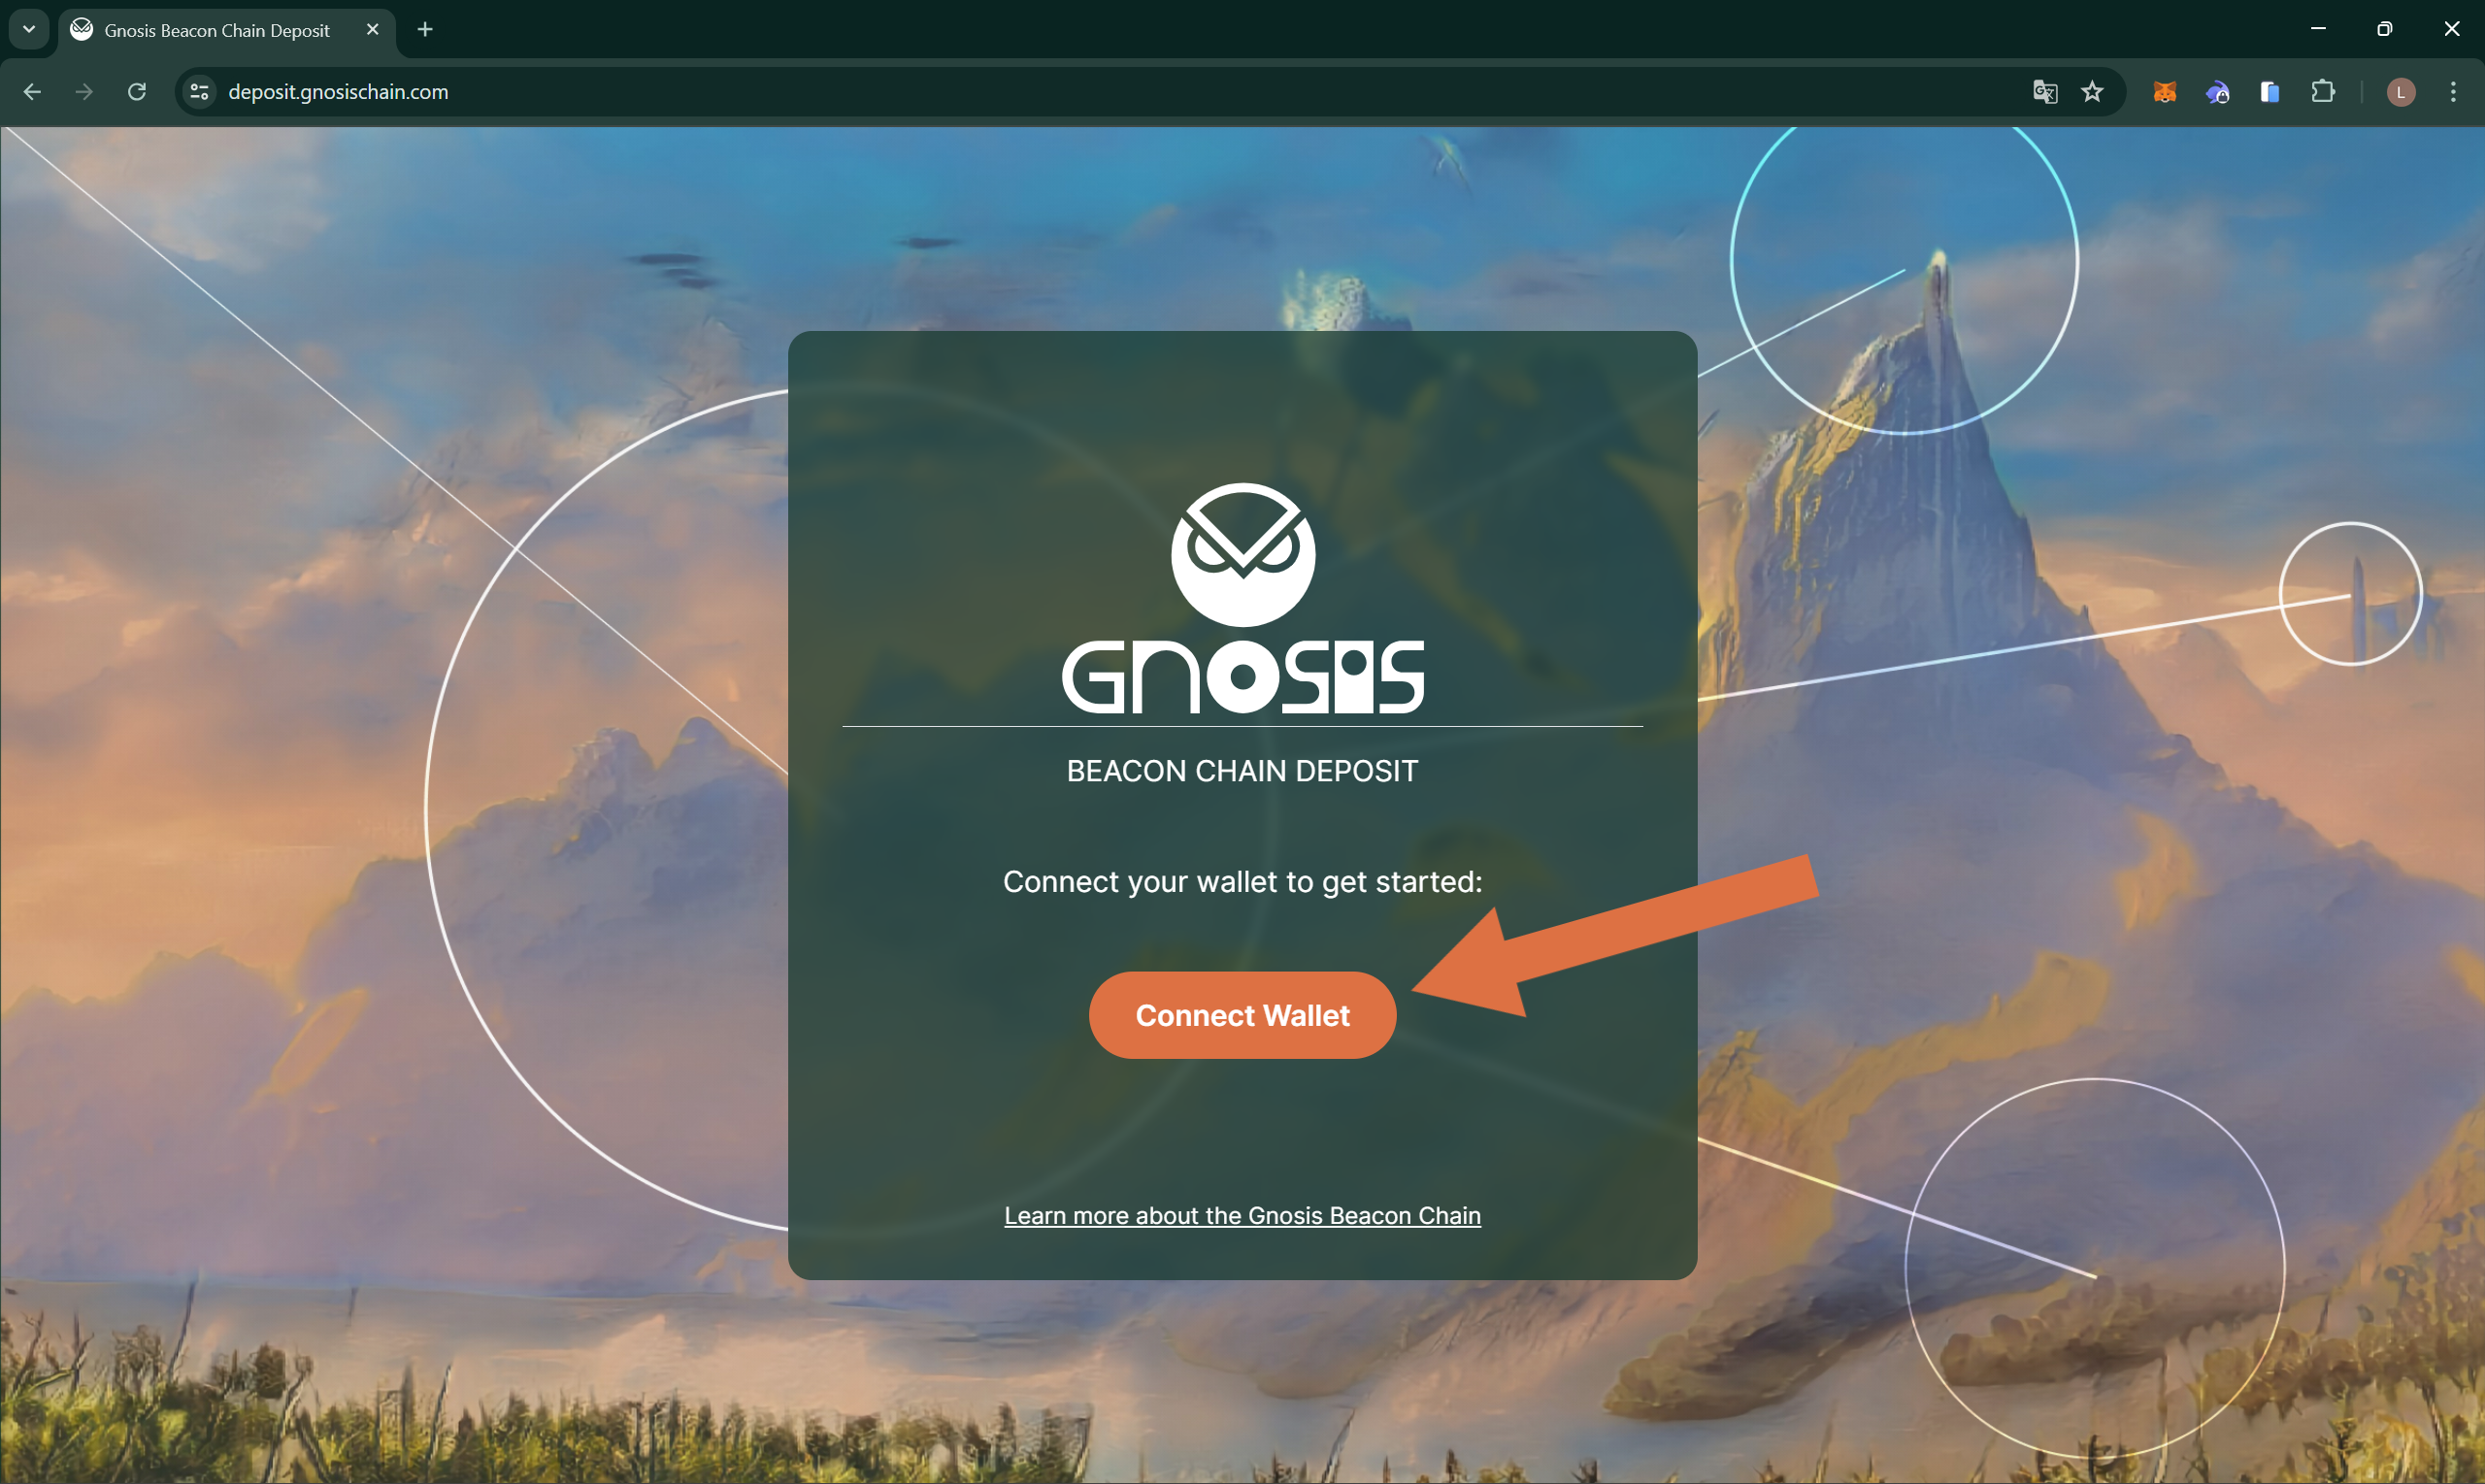
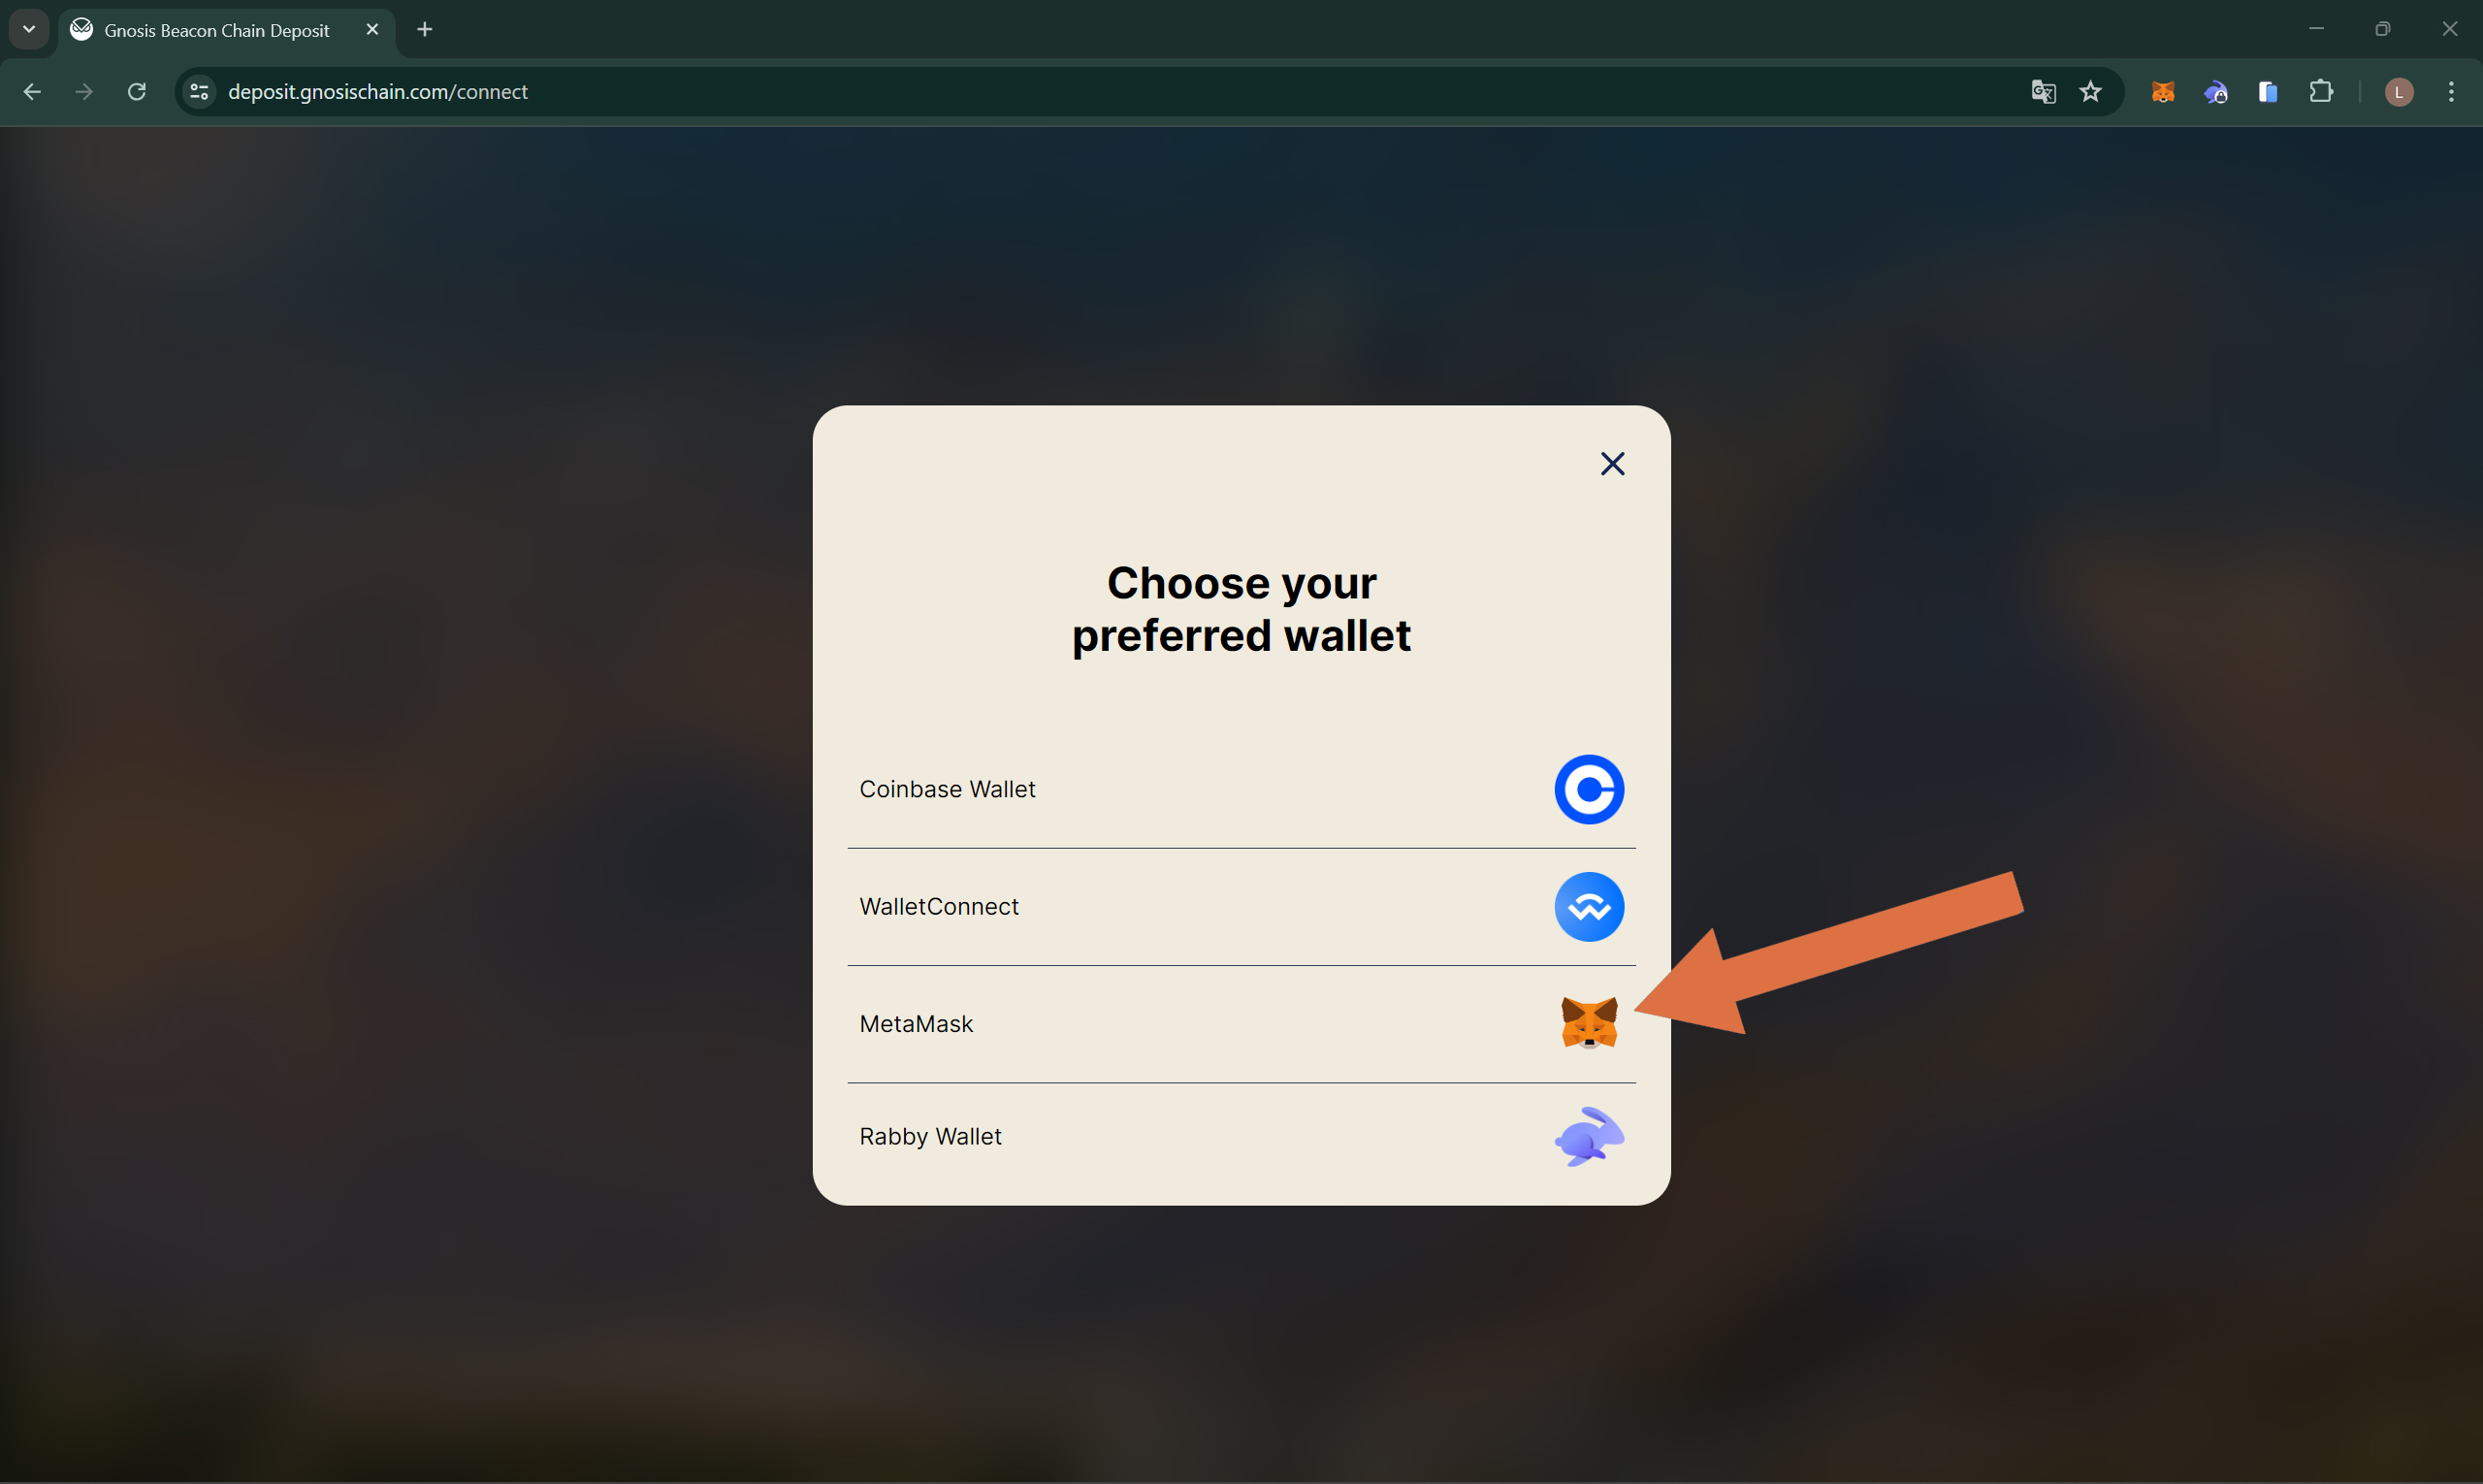
Step 1: Connect your Wallet
- Go to https://deposit.gnosischain.com/ and connect your web3 wallet on the Gnosis Chain to the application.
In this example we use MetaMask.
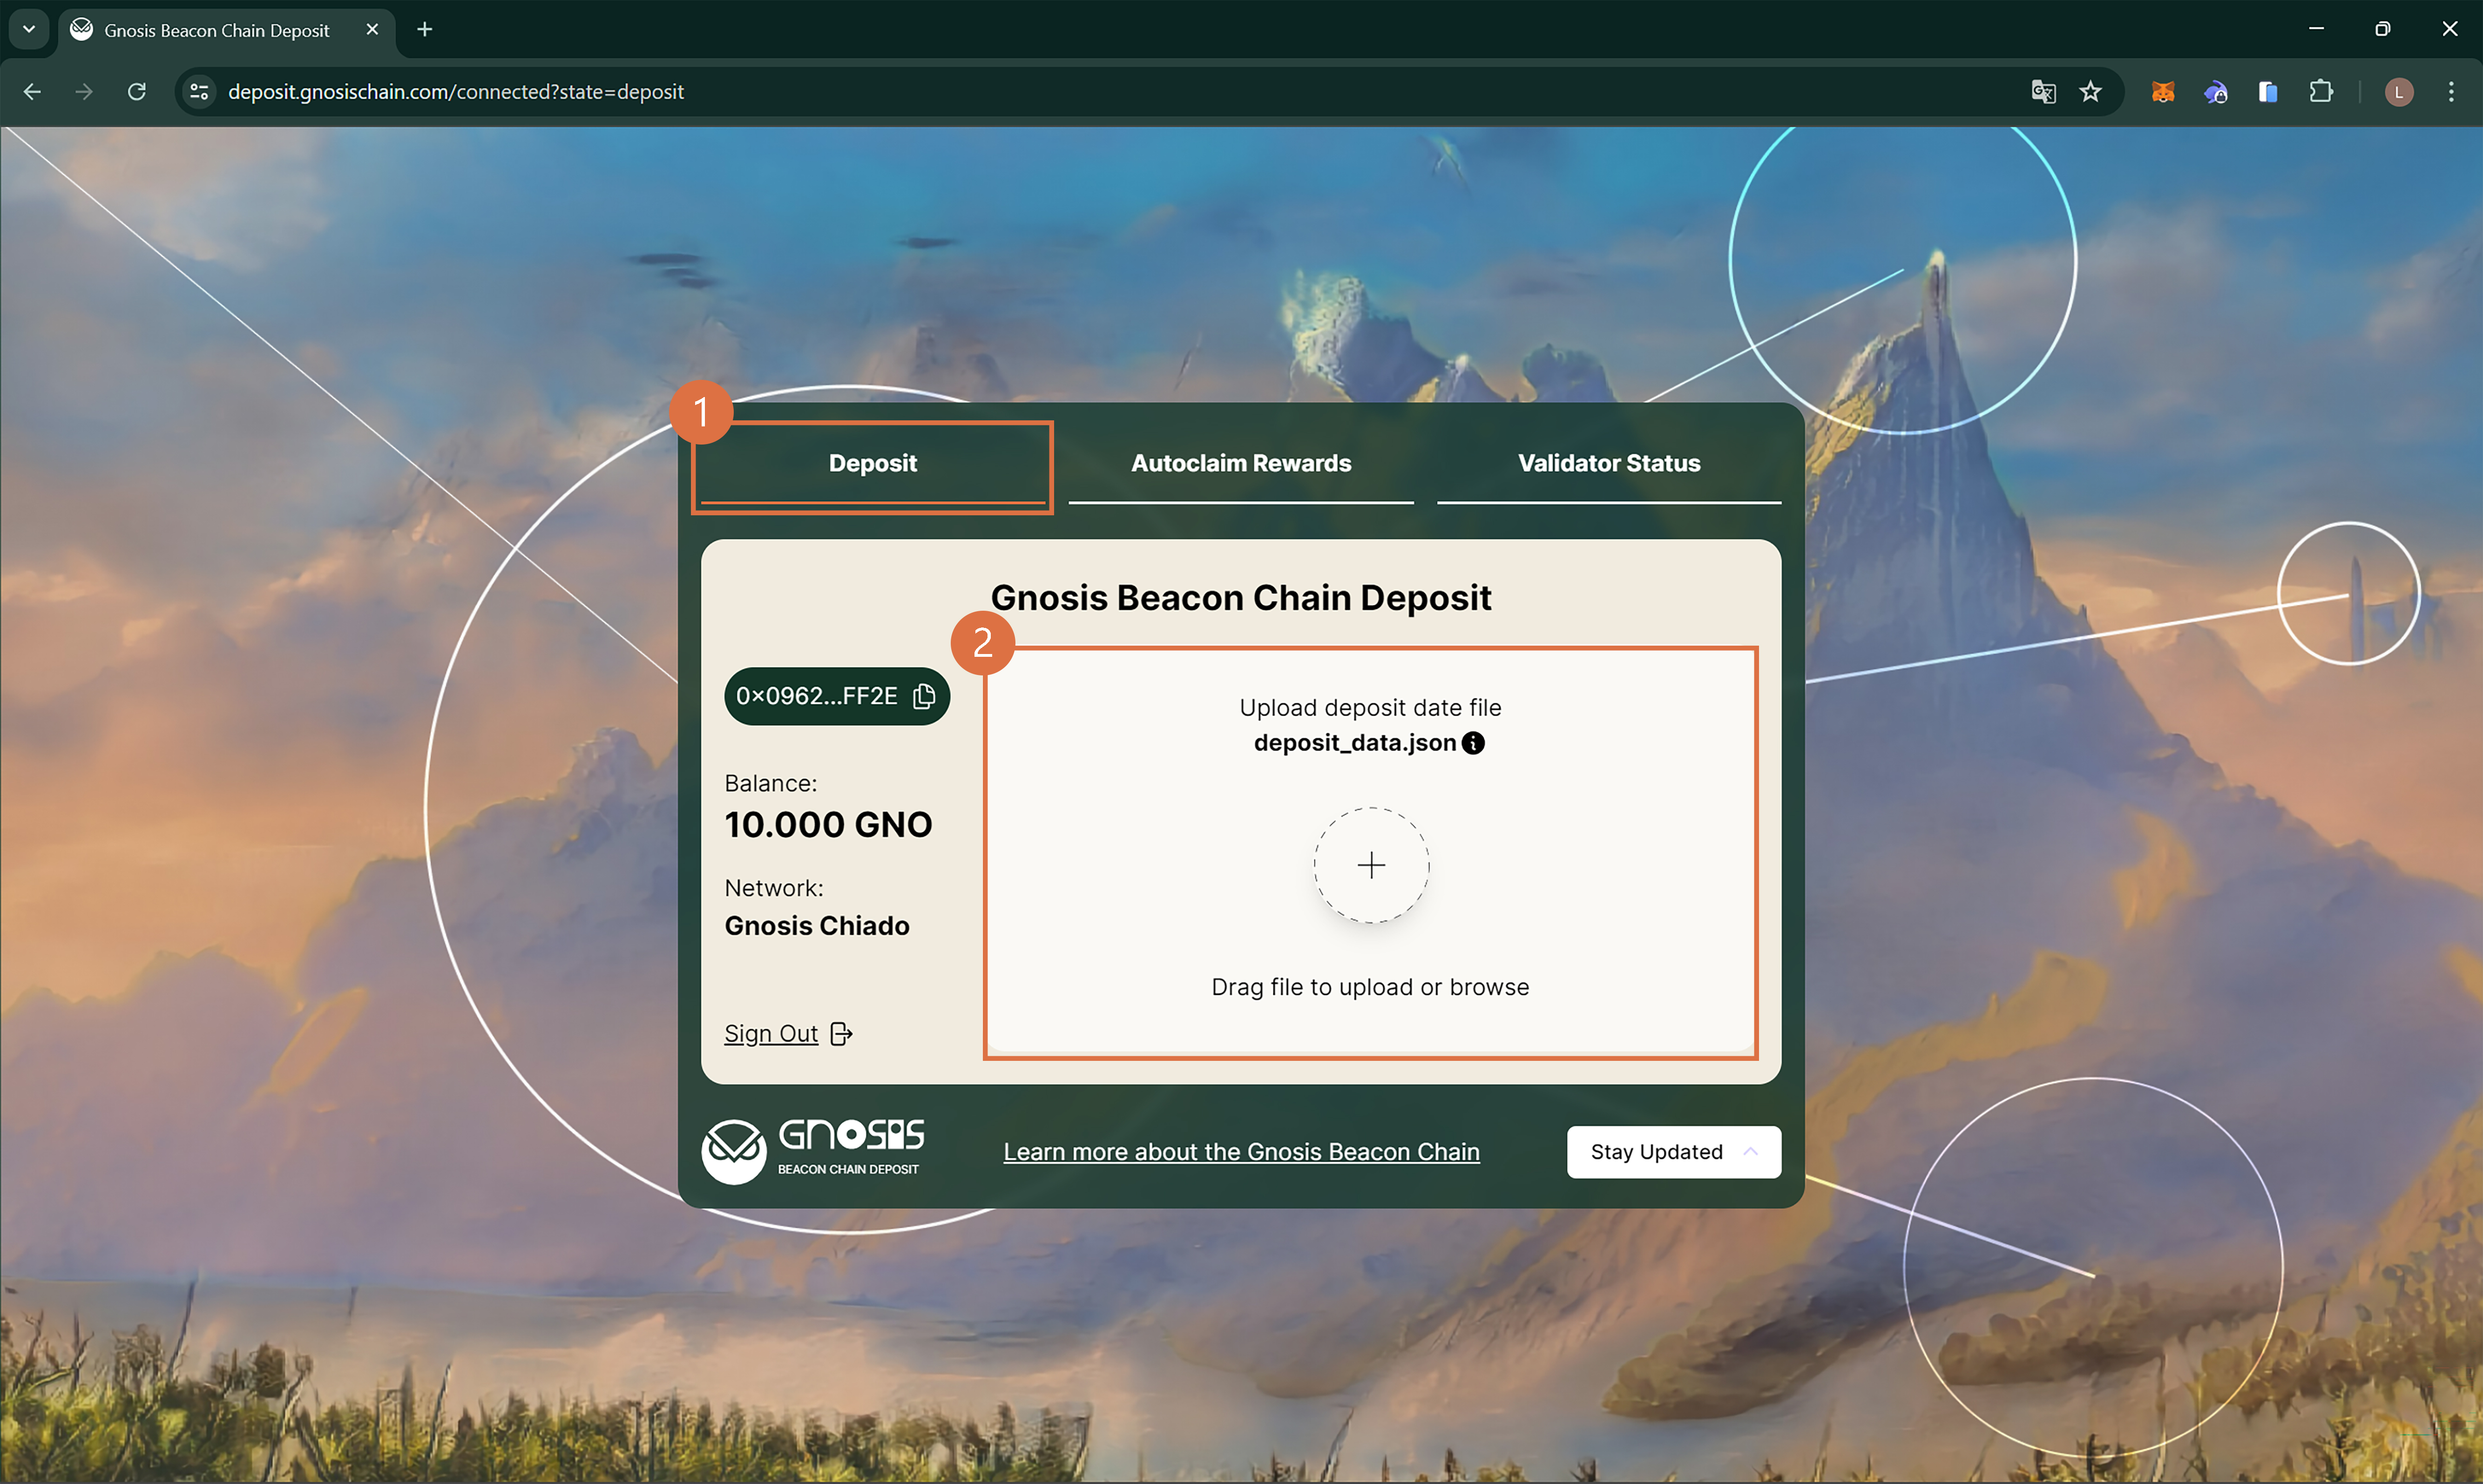
Step 2: Upload deposit_data.json
- Select the Deposit tab. Upload your
deposit_data.jsonfile from Step 4 of the interactive guide It will be located in the same folder as the generated keystores.
If you can't upload the file, you may want to check the file permissions to make sure the user account you are logged in as has read permissions. You can grant permissions using the sudo chmod command.
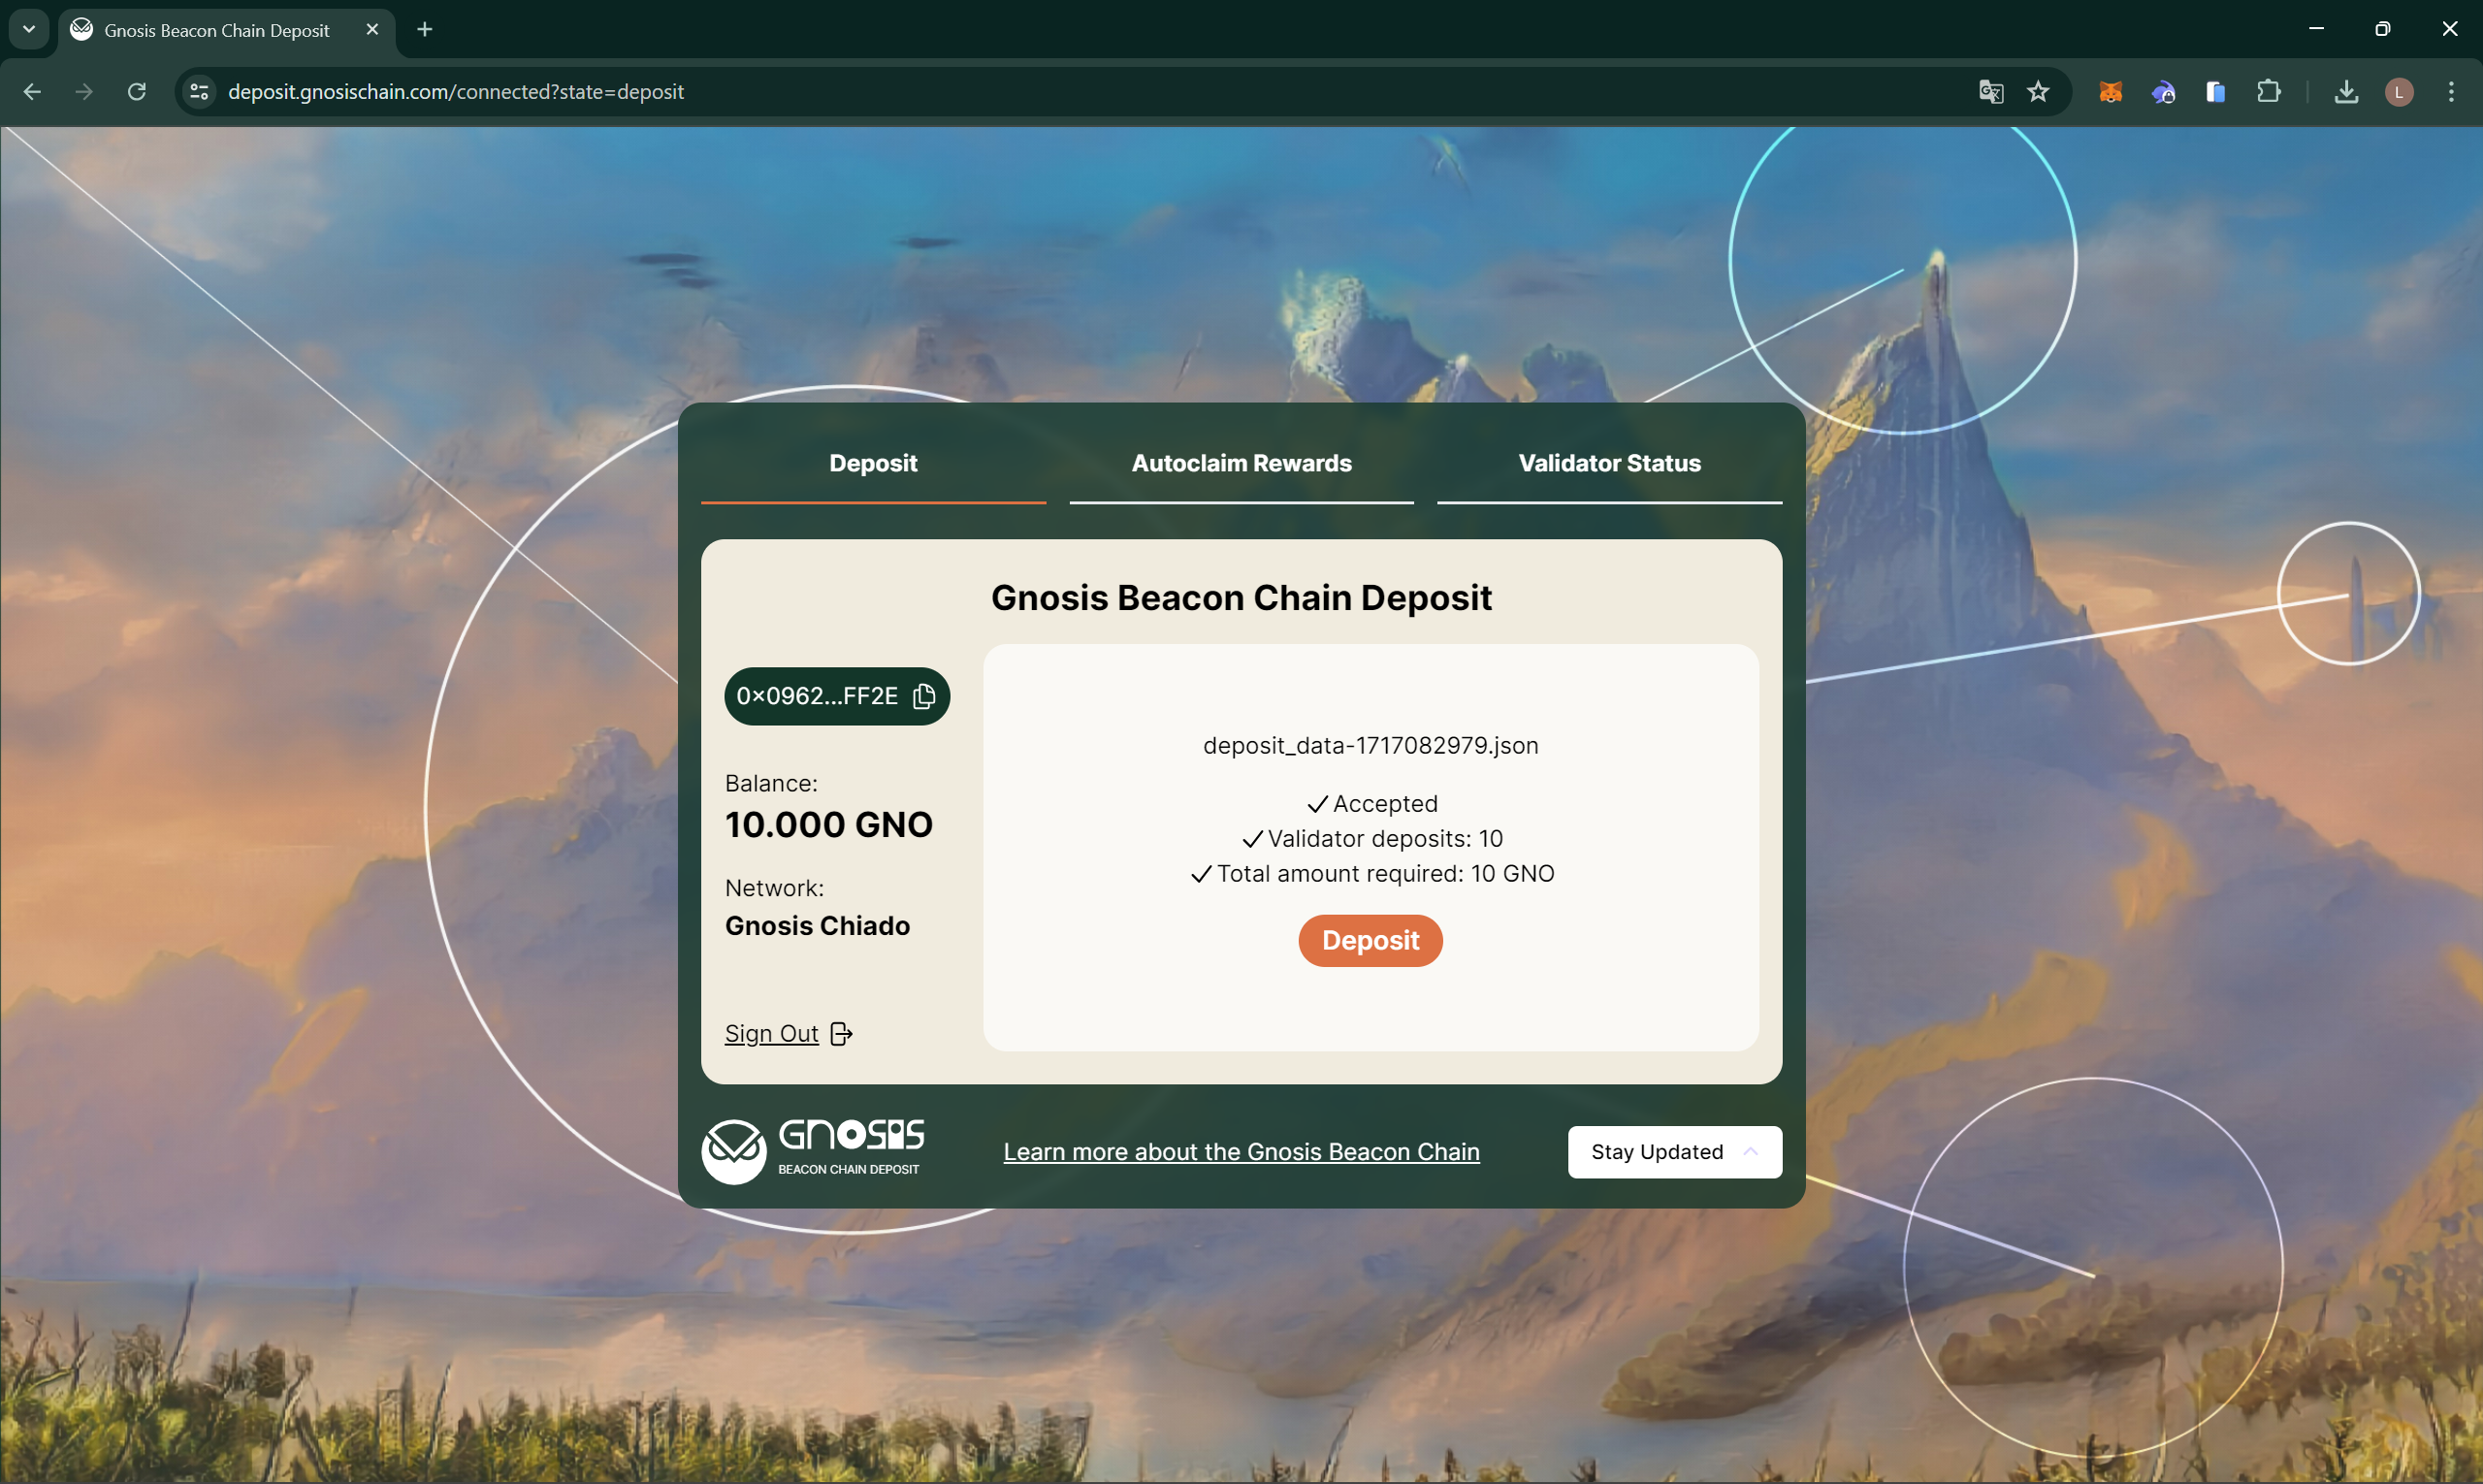
Step 3: Validate Deposit data
- The app will validate the json file and list the number of validator deposits you are making and the required GNO to deposit. Click Deposit to continue.
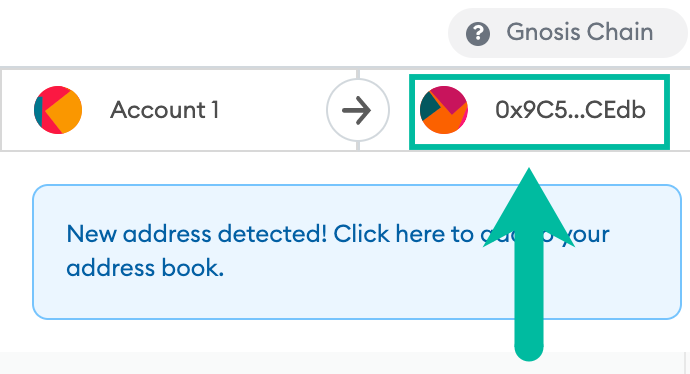
Step 4: Verify Transaction Parameters
You are responsible for the transaction. Fraudulent websites might try to lure you into sending funds to them, instead of the official deposit contract. Make sure that you are sending the transaction with the correct data.
Verify that the contract address you're interacting with is 0x9C58BAcC331c9aa871AFD802DB6379a98e80CEdb (GNO on Gnosis Chain)
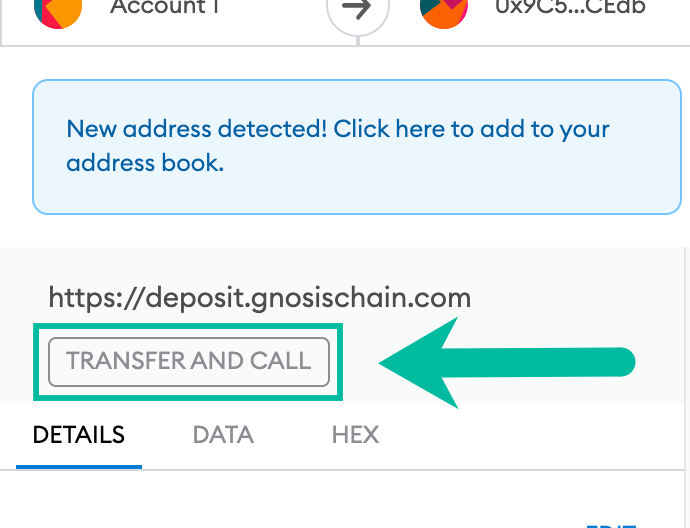
Check that the transaction uses the transferAndCall method.
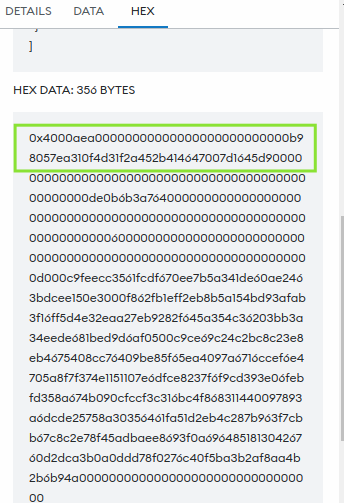
Check that the transaction's data includes the Deposit Contract address (0x0B98057eA310F4d31F2a452B414647007d1645d9)
0x4000aea00000000000000000000000000b98057ea310f4d31f2a452b414647007d1645d9
Step 5: Complete Deposit
- Complete the deposit.
Step 6: Validator Activation
It will take about 1.5 hours for your validators to start proposing and attesting to blocks.
- Following a successful deposit, the Gnosis Beacon Chain will wait for 1024 Gnosis Chain blocks plus up to 64 Gnosis Beacon Chain epochs before adding validators to the pool.
- This is roughly 1 hour and 25 minutes before the validators start proposing and attesting blocks on the Gnosis Chain.
- Once live, you can view your validator(s) on the explorer. Copy the pubkey(s) listed in the deposit_data.json file (a key will be generated for each validator as "pubkey": "<your-public-key>") and paste into the search box on the Beacon chain explorer.
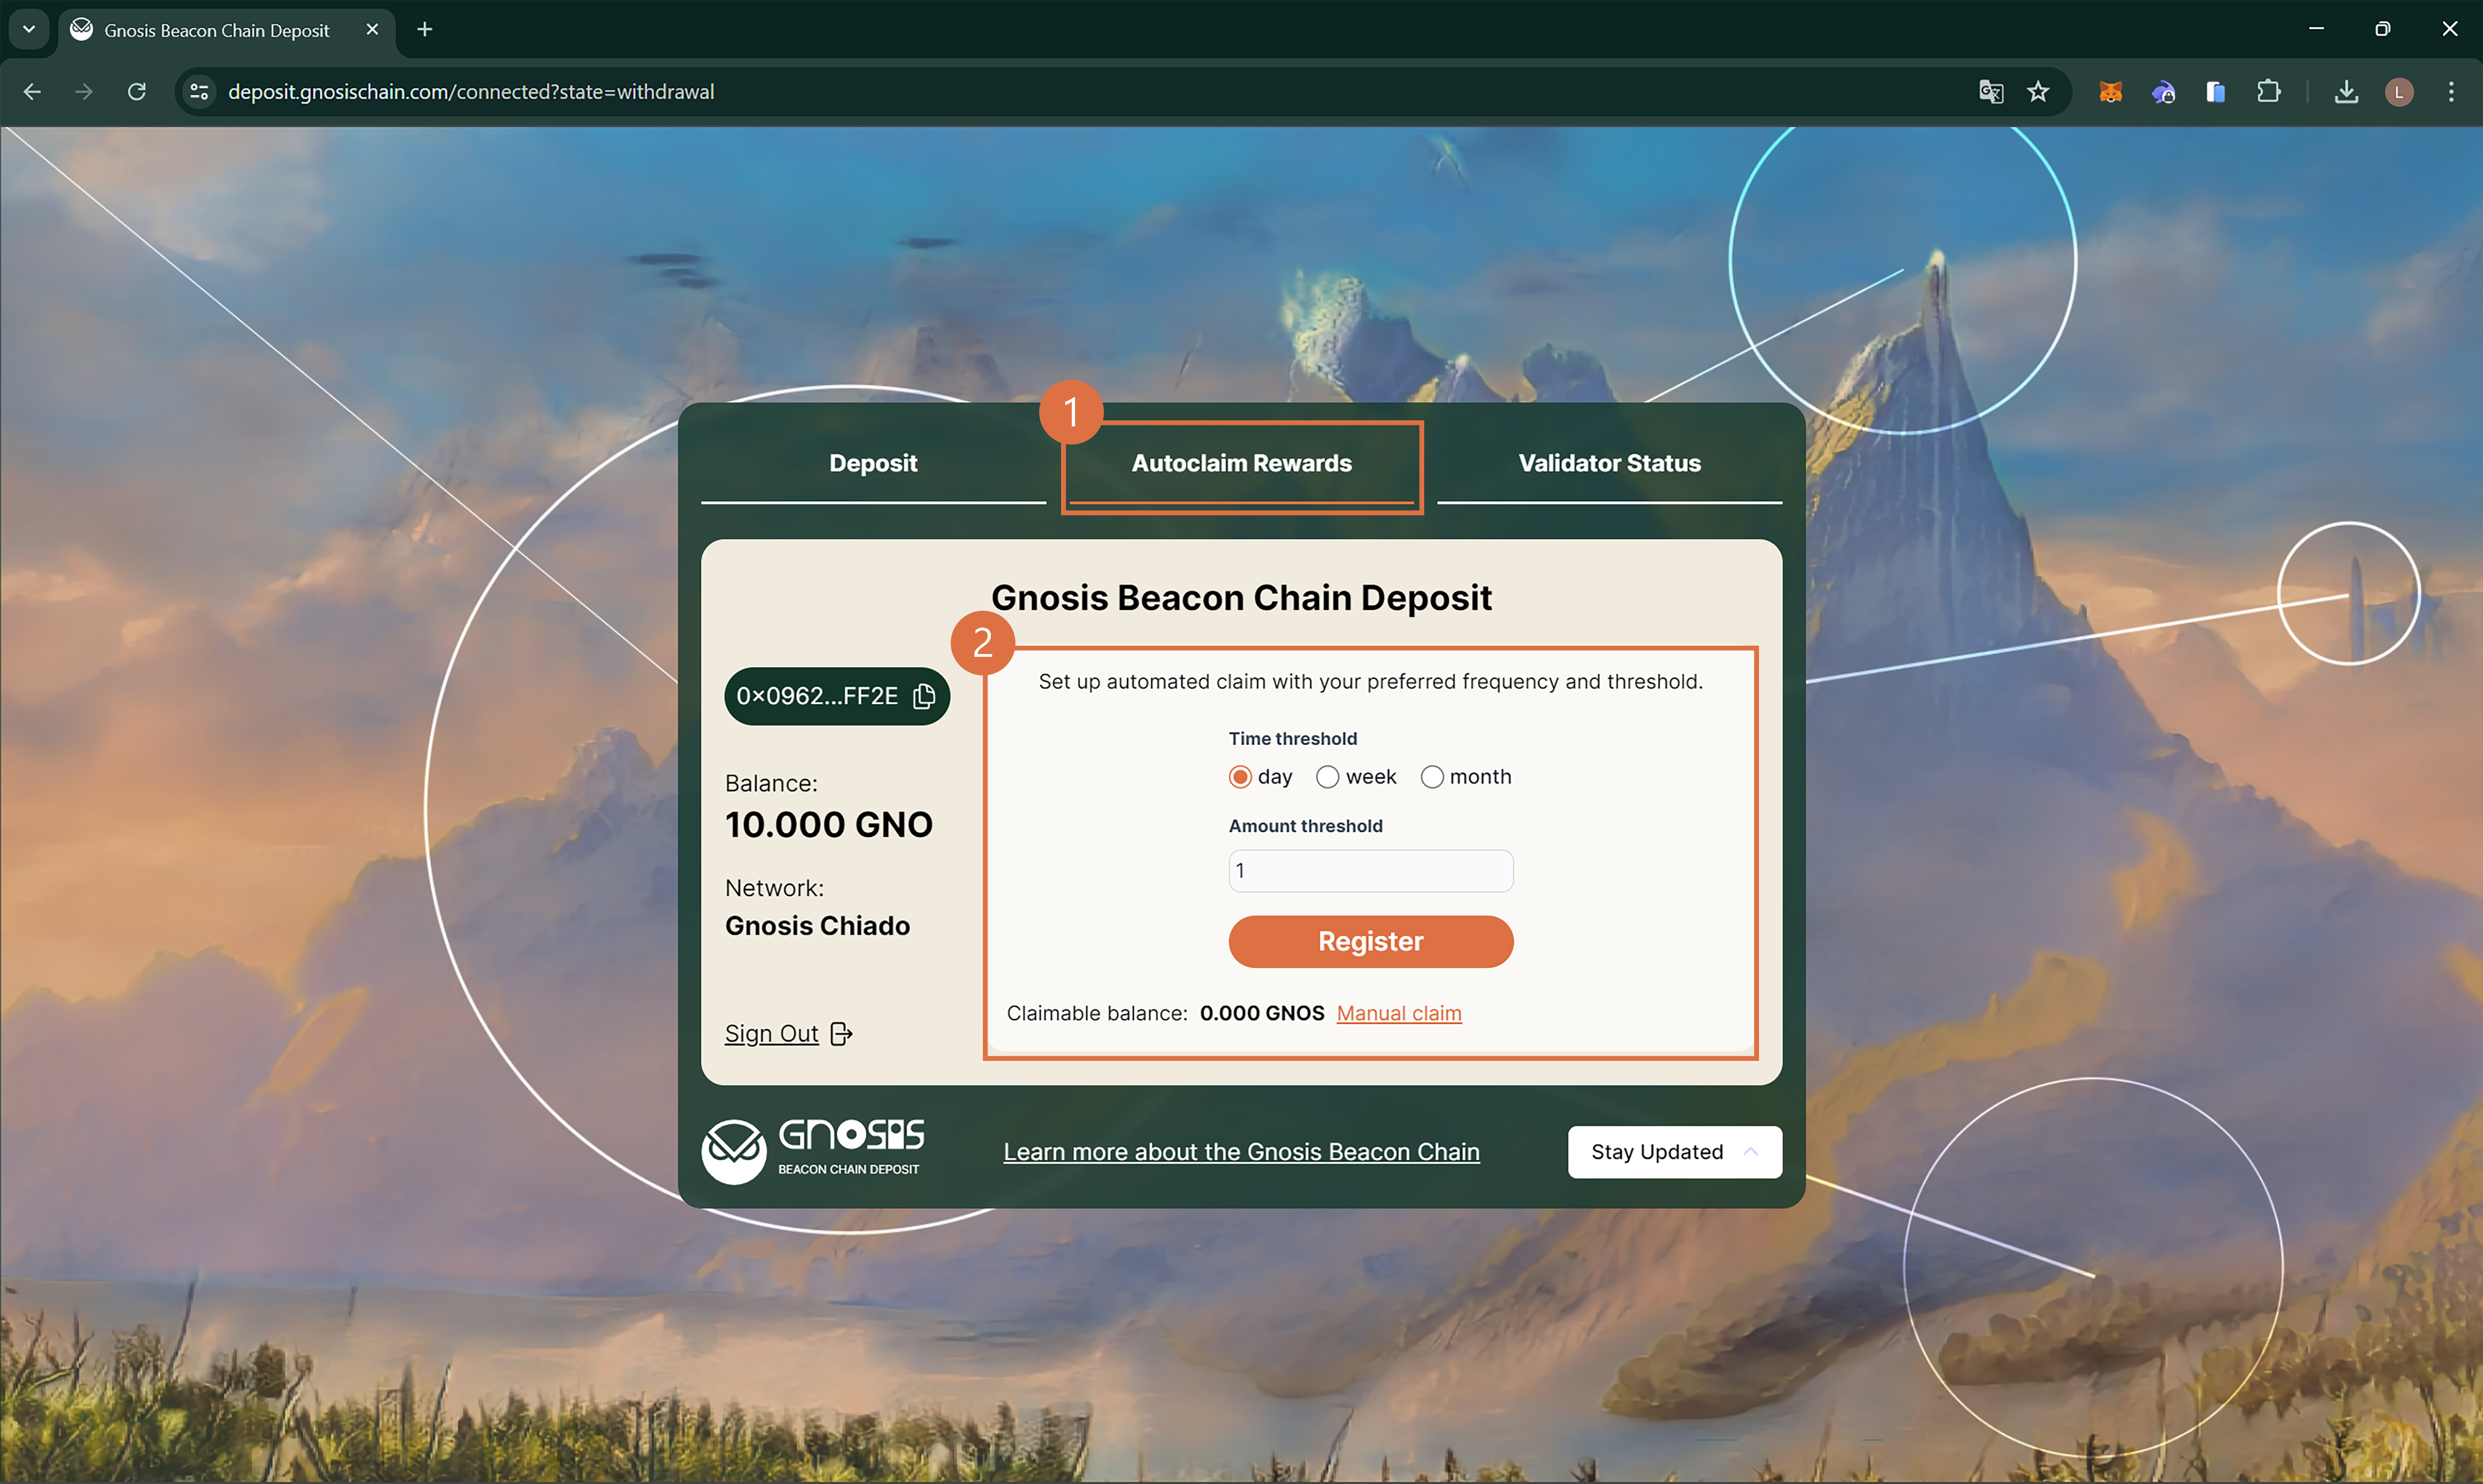
Step 7 (optional): Subscribe Autoclaim
- Select the Autoclaim Rewards tab. Set the frequency and minimum threshold for automatic token claims based on your preference. After configuring, click Register to continue.
Option 2: Direct interaction with Contracts
A modification to the Gnosis Chain deposit contract allows you to deposit in batches (this functionality is not available for the ETH2 deposit contract). One transaction can be used to initiate deposits for up to 128 validators. The assumption is that every validator deposits 1 GNO in every entry of the batch. The following script simplifies the process.
Step 1: Get Deposit Script
Pull the docker image with the deposit script:
docker pull ghcr.io/gnosischain/deposit-script:latest
Step 2: Configure .env file
Prepare .env file with the following lines:
STAKING_ACCOUNT_PRIVATE_KEY=0000000000000000000000000000000000000000000000000000000000000000

RPC_URL=https://rpc.gnosischain.com
GAS_PRICE=2000000000

# number of deposits in one transaction, should be in range [1, 128]
BATCH_SIZE=128
# total number of deposits to read from file
N=256
# index of the first deposit to read from file
OFFSET=0

# address of the GNO token
TOKEN_ADDRESS=0x9C58BAcC331c9aa871AFD802DB6379a98e80CEdb
# address of the GBC deposit contract
DEPOSIT_CONTRACT_ADDRESS=0x0B98057eA310F4d31F2a452B414647007d1645d9
# block where the deposit contract was deployed at
START_BLOCK_NUMBER=19469077
STAKING_ACCOUNT_PRIVATE_KEY is the private key of the account which holds the necessary amount of GNO tokens for deposit. Any account may be used for funding, but it must also have a small amount of xDai to process transactions. In the above example, 2 transactions will occur with 256 total deposits of 1 GNO each.
Step 3: Import deposit_data.json files
Copy the deposit_data.json generated during Step 4 of the interactive guide to the current directory.
Step 4: Run Deposit script
Run the deposit script (/path/to/ should be a valid path to the .env file you have created):
docker run --rm --env-file /path/to/.env \
    -v $(pwd)/deposit_data-xxxxxxxxxx.json:/tmp/deposit_data.json \
    ghcr.io/gnosischain/deposit-script:latest /tmp/deposit_data.json
Step 5: Validator Activation
It will take about 1.5 hours for your validators to start proposing and attesting to blocks.
- Following a successful deposit, the Gnosis Beacon Chain will wait for 1024 Gnosis Chain blocks plus up to 64 Gnosis Beacon Chain epochs before adding validators to the pool.
- This is roughly 1 hour and 25 minutes before the validators start proposing and attesting blocks on the Gnosis Chain.
- Once live, you can view your validator(s) on the explorer. Copy the pubkey(s) listed in the deposit_data.json file (a key will be generated for each validator as "pubkey": "<your-public-key>") and paste into the search box on the Beacon chain explorer.
Option 3: Running Your Own Deposit UI Instance Locally
Step 1: Dependencies
Ensure that you have NodeJS and npm installed.
You can check the installation by running node -v and npm -v in your terminal.
Additionally, install Next.js by running the command npm install next.
Step 2: Download the Deposit UI from GitHub
Download the Deposit UI files from the corresponding Gnosis Chain GitHub Repo. Extract the ZIP file to wherever you want to.
Step 3: Edit Configuration Files
- Edit the file
wagmi.tsin themain project folder: change the Mainnet RPC tohttps://gnosis-rpc.publicnode.comonline 11(you may also choose another RPC, not all work) - Edit the file
fetchEvents.tsin theutils folder: change theBLOCK_RANGE_SIZEto10000online 6(previous value was1000000)
Step 4: Run the UI
- Run the UI using the command
npm run dev(in the main folder of the UI); if this doesn't work, it might need to be built or dependencies are missing try something likenpm install typescript. - Open http://localhost:3000/ in your browser, the UI should appear now if it all works correctly.
Step 5: Use the UI
- Connect your wallet and ensure you are connected on the right network (Gnosis Chain).
- Ensure that you have an adequate amount of GNO in your wallet to deposit to all pending validators listed in your
deposit_data.json. - Add your
deposit_data.jsonfile to the UI once you're asked for it. - Wait for the UI to load the completed deposits from the external RPC. Please have some patience as the RPC is rate limited.
This process will take about 20 minutes. The UI will not show any progress for getting the blocks from the RPC once you've submitted your JSON file. If you use the browser console window (using right-click "Inspect"), you can see the block number going up though.
Step 6: Send Deposit Transactions
For each validator in the file, a deposit transaction will be generated and sent to your wallet. Verify the transaction details (closer described in Option 1 above). Once verified, send out the transactions and wait for validator activation.
Step 7: Validator Activation
It will take about 1.5 hours for your validators to start proposing and attesting to blocks.
- Following a successful deposit, the Gnosis Beacon Chain will wait for 1024 Gnosis Chain blocks plus up to 64 Gnosis Beacon Chain epochs before adding validators to the pool.
- This is roughly 1 hour and 25 minutes before the validators start proposing and attesting blocks on the Gnosis Chain.
- Once live, you can view your validator(s) on the explorer. Copy the pubkey(s) listed in the deposit_data.json file (a key will be generated for each validator as "pubkey": "<your-public-key>") and paste into the search box on the Beacon chain explorer.
Appendix
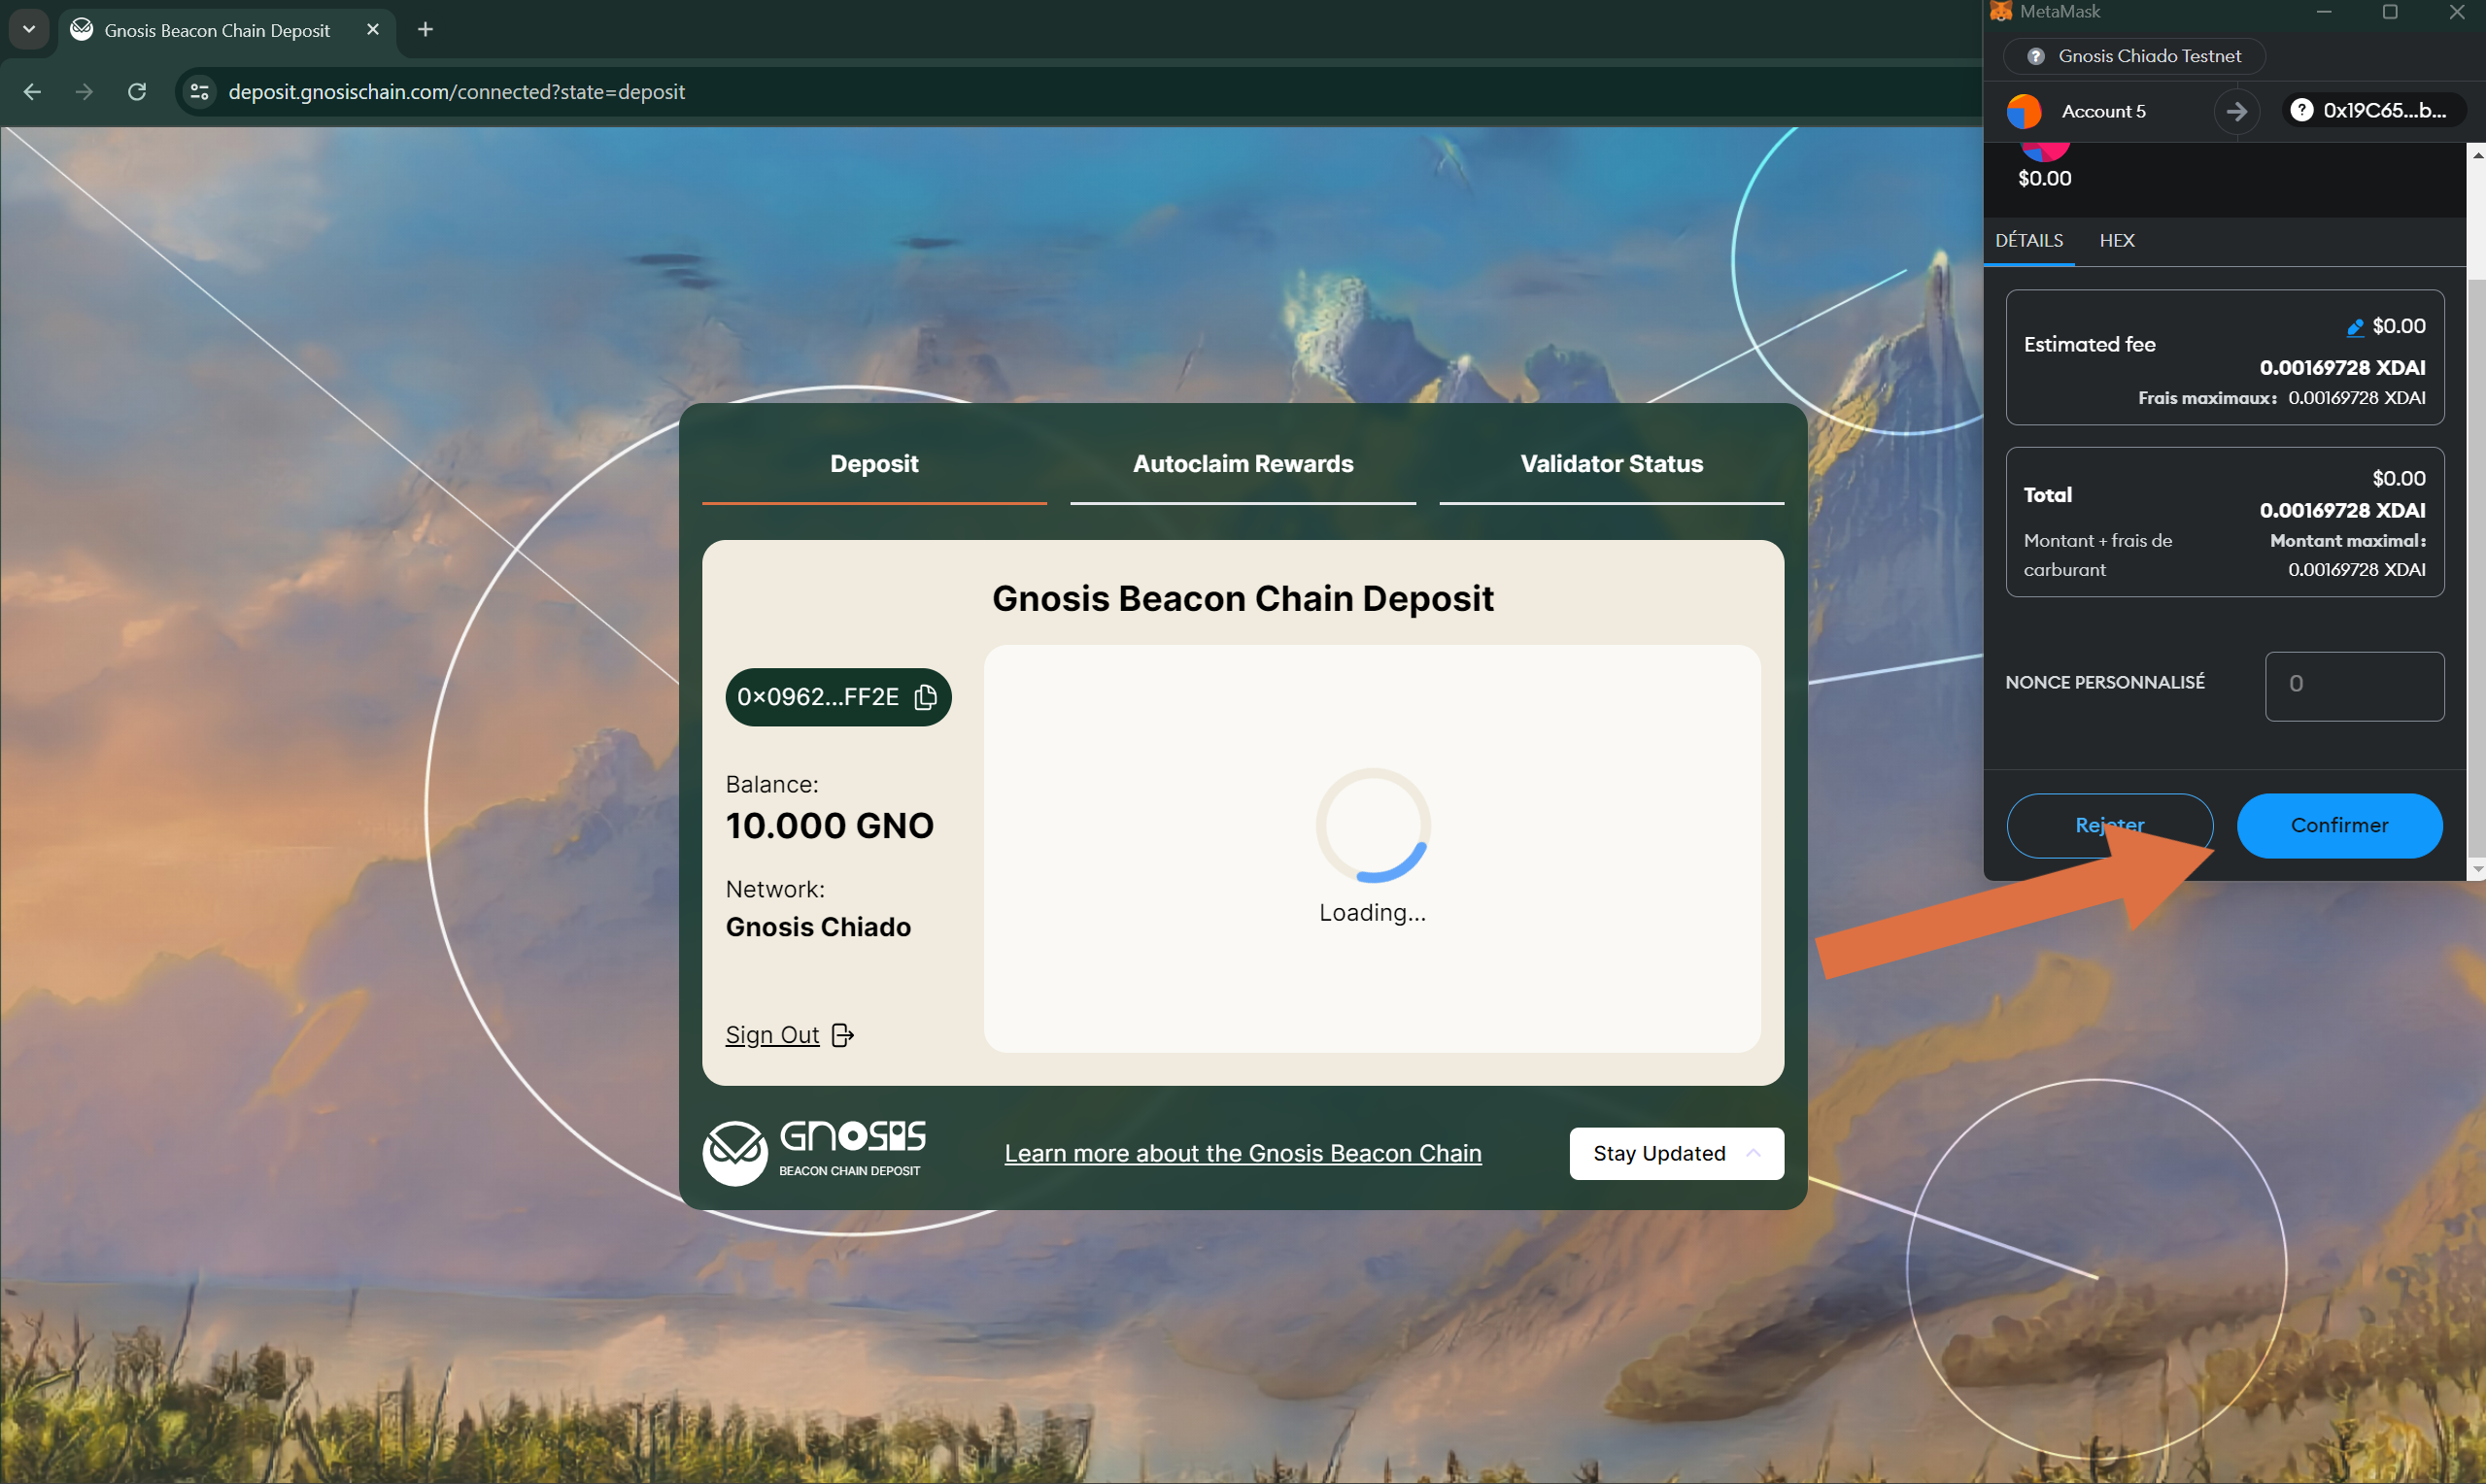
Depositing For Chiado Testnet
Required:
- Chiado Testnet xDai and GNO: https://faucet.chiadochain.net/
- Connect to Deposit UI https://deposit.gnosischain.com/ using Gnosis Chiado Testnet and follow the Option 1: Deposit UI.